
Below you will find a step-by-step guide showing how to complete a participant registration using Conference Managers platform.
Depending on how the organiser has configured the event, some steps may vary or be skipped automatically, and not all of the steps below will necessarily appear.
Step 1: Sign up
On the first page (after choosing a participant category, if applicable), enter the information requested by the organiser — typically first name, last name and e-mail, but there may be additional fields.
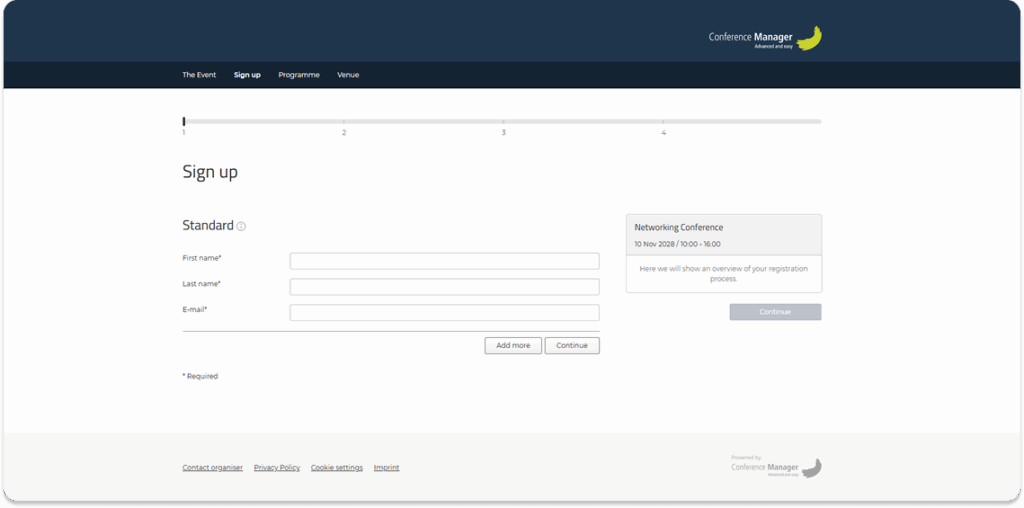
If the organiser has allowed it, you can click Add more to register additional participants (for example a colleague). You may also have the option to add a companion.
When all information has been entered, click the Continue button below the information fields.
Basket functions
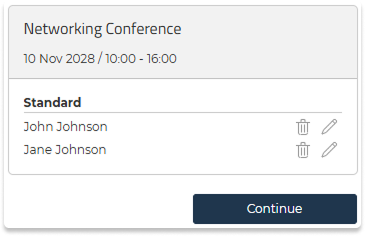
In the basket, you can see all participants you are registering.
You can also:
- edit a participant using the pencil icon (✏️)
- remove a participant using the trash icon (🗑️)
Step 2: Programme
Some events include a programme, but it will only appear in the registration flow if the organiser has specifically enabled it.
If the organiser has made the programme part of the sign-up process, you will now see an overview of all programme tracks.

Depending on the setup, you may:
- simply view the programme and continue, or
- need to select one or more tracks.
Click a programme item to open its details, then click Register and Save if selection is possible.
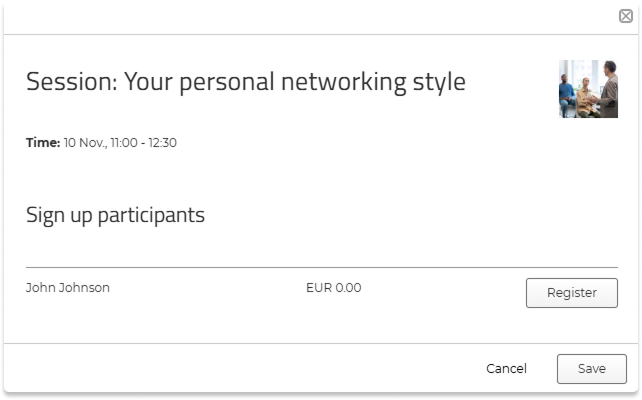
If you are registering multiple participants, you will be able to make programme track selections for each person.
Required programme items
If you must choose between programme tracks, the system will notify you. Required programme tracks are marked with an asterisk (*).

If you try to continue without completing a required selection, a message will appear at the top of the page indicating which sessions still require a choice.
If no selections are needed, simply click Continue.
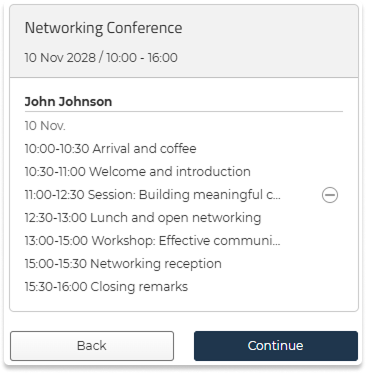
Basket functions
In the basket, you will see the programme items you have selected. If you are registering multiple participants, each session will be shown under the name of the person it belongs to.
If tracks are required, they will be added to the basket automatically.
You can remove a session by clicking the minus icon (⊖), unless it is required.
Step 3: Accommodation
If the event offers accommodation, the options will appear as the next step.
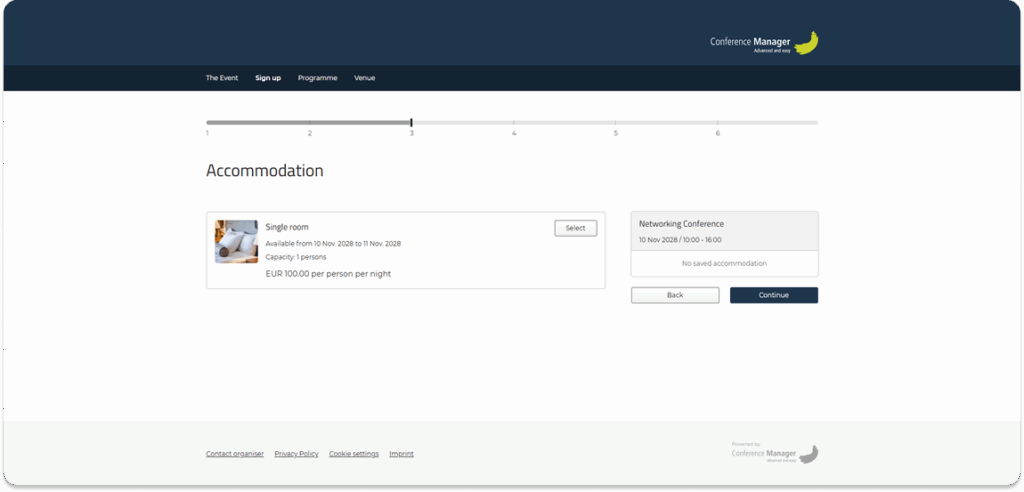
Click Select to add a room to your registration.
If you are registering multiple participants, you can choose accommodation for each person. Accommodation options can vary depending on the participant category.
Some room types may require a minimum number of guests. If this applies, the requirement will be displayed on the room option.
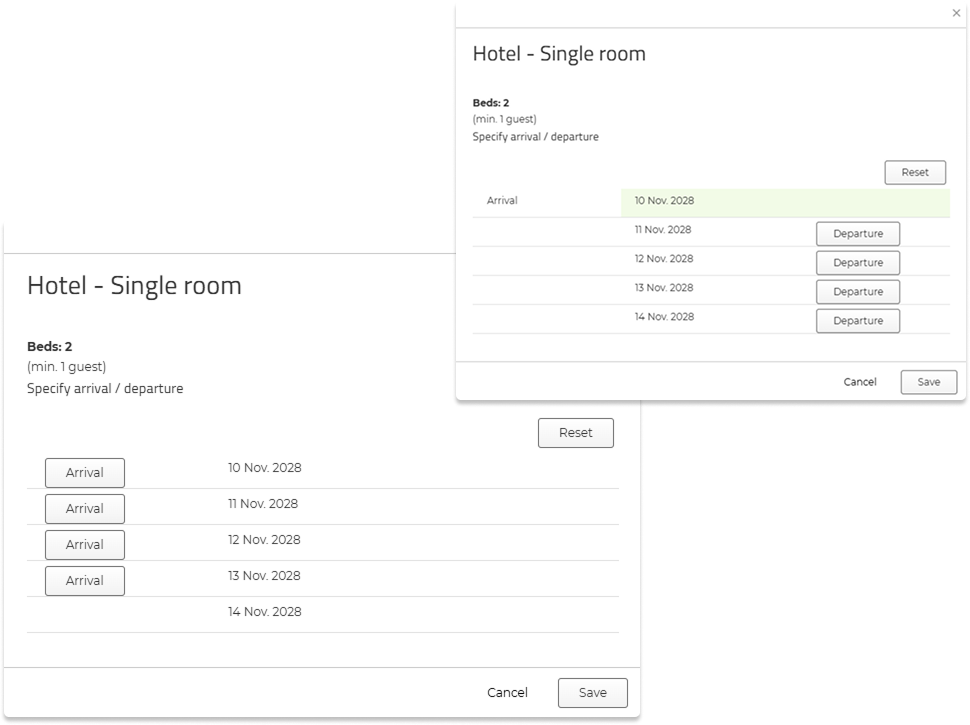
If the event lasts several days and the organiser allows booking accommodation on specific dates of your choice, you will be able to select the exact nights you wish to include.
When choosing your dates, click Arrival and then Departure next to the dates to define your stay.
You can also click Reset if you want to clear your selection and choose different dates.
If you do not wish to book accommodation, double-click Continue.
If you click Continue once, the system will show a message informing you that no accommodation has been selected — click Continue again to proceed.
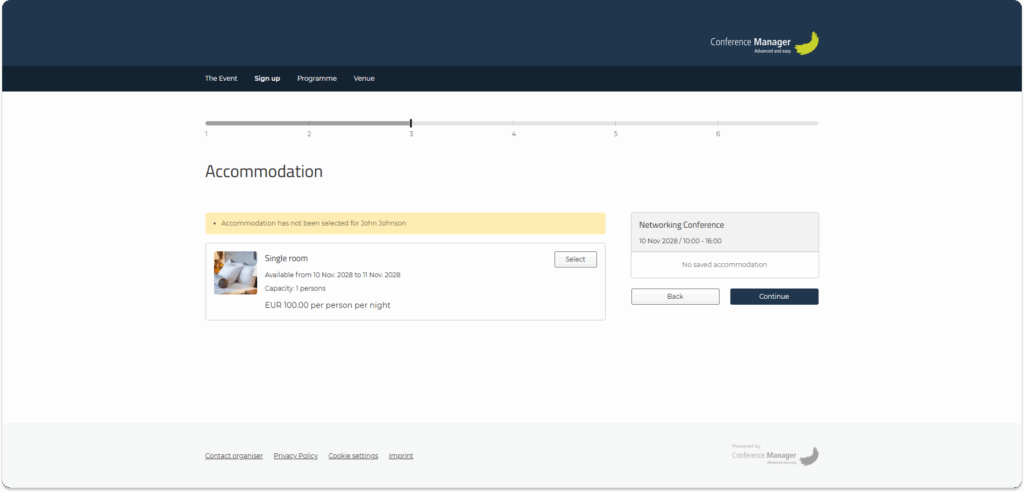
Mandatory accommodation
If accommodation is required, the message will reappear and you will not be able to continue until you select one of the available room types.
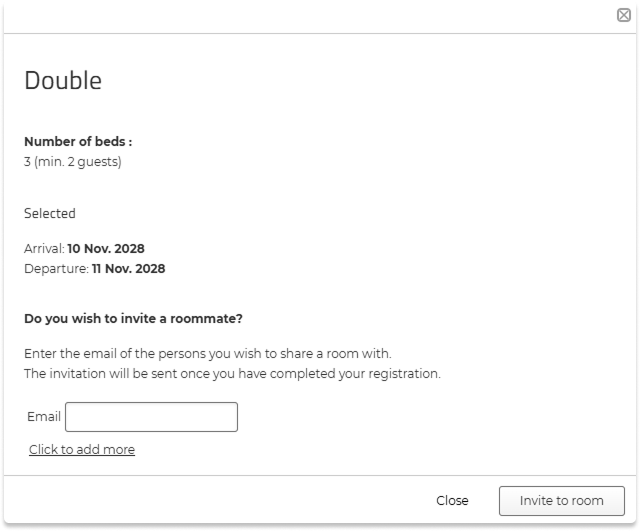
Roommate search and invitations
If you book a room that accommodates more than one person, and it is allowed to choose a roommate from other participants who are not part of your order, additional options will appear.
At the top of the accommodation step, you can search for a roommate who is already registered for the event.
Enter their email address or booking number to find them, and select them as your roommate if matching rooms are available.
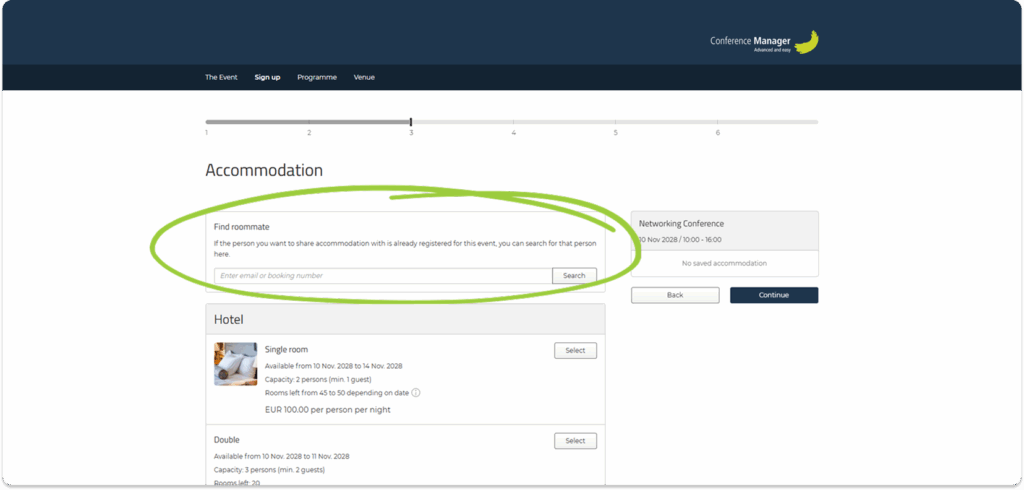
You can also request to share the room with one or more invited people by entering their email address. The request will be sent once your registration is completed.
Basket functions
In the basket, you can see the accommodation selected for each participant.
Each participant’s room choice will be shown under their name.
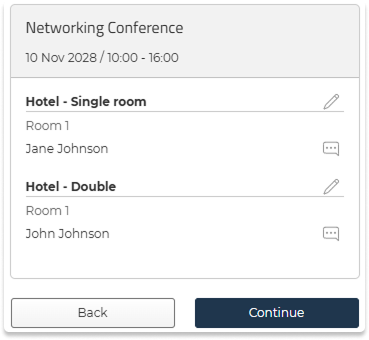
You can edit an accommodation selection by clicking the pencil icon (✏️).
You can also add a comment to the booking by clicking the speech bubble icon (💬).
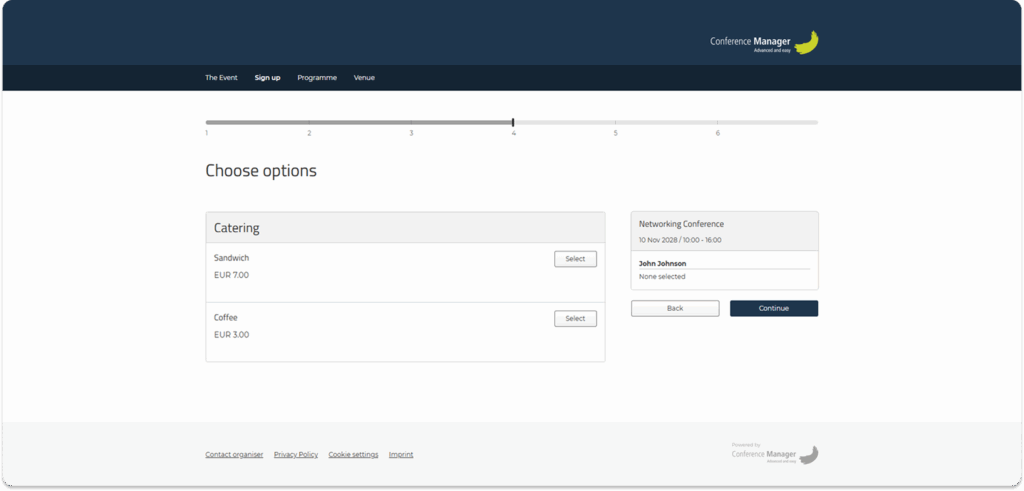
Step 4: Options
If the organiser offers options — such as catering, materials, transportation, or other add-ons — they will appear here.
Click Select to add an option.
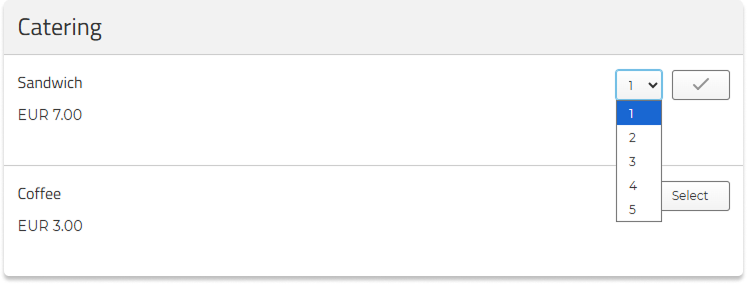
Selecting multiple quantities
If an option allows you to order more than one item, a quantity dropdown will appear after clicking Select. Click the number you want to select.
Mandatory options
Mandatory options are marked with an asterisk (*).
If an option is mandatory but does not require any selection, it will already be preselected for you.
If a mandatory field requires you to choose between multiple options, you must make a selection before continuing.
If you try to continue without selecting it, the system will display a message indicating what you need to select.
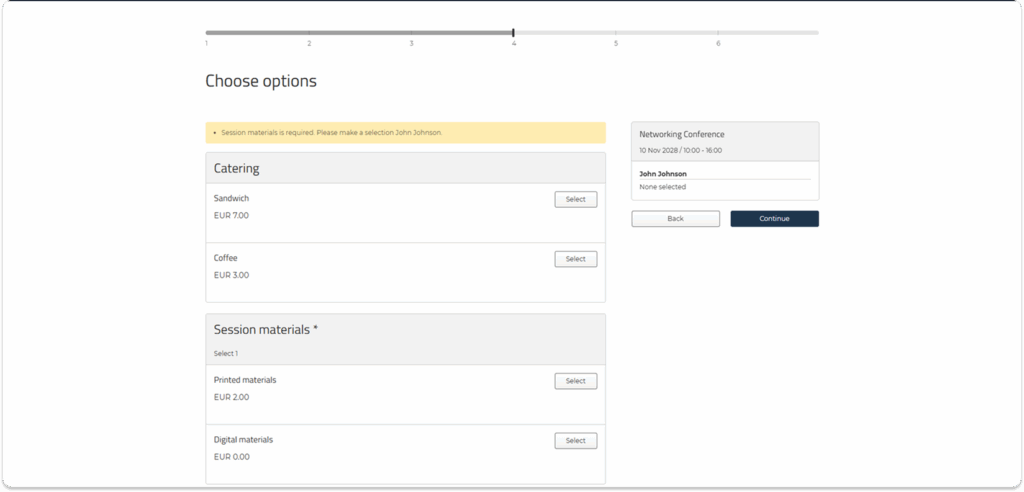
Click Continue when your selections are complete.
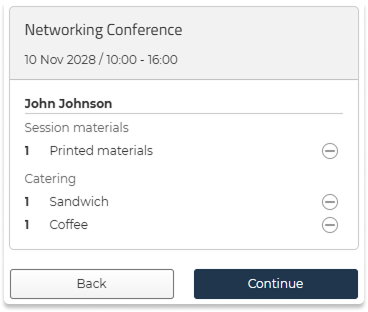
Basket functions
In the basket, you can see all selected options for each participant, including quantities.
You can remove an option by clicking (⊖).
Step 5: Seats
If the event includes numbered seating, a seat selection step will appear.
You will see a seating map (e.g. tables or rows) showing all available seats.
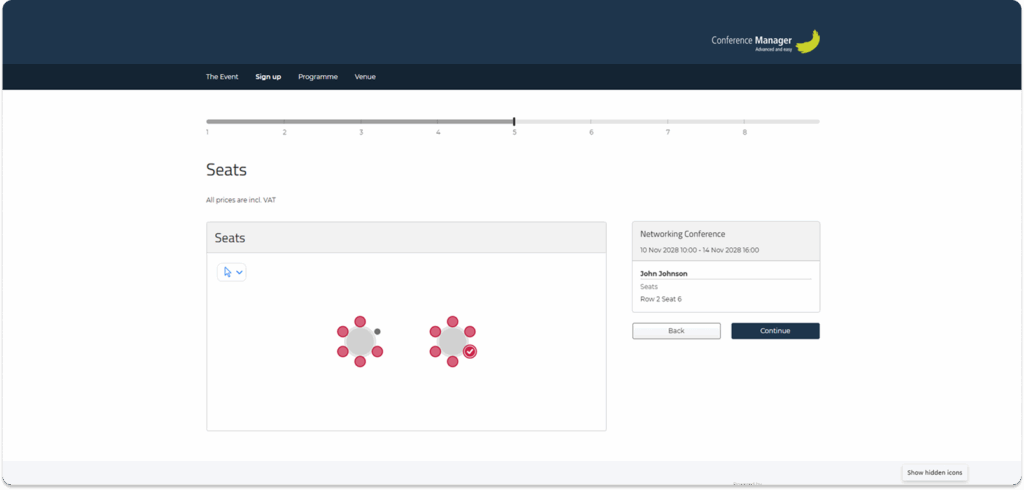
- Click a seat to select it.
- If you are registering multiple participants, you can choose seats for each person.
Unavailable or already booked seats will be shown in grey.
Selection tools
The default selection tool is the arrow, which lets you click seats individually.
If you want to select several seats at once, you can use the selection tools at the top of the seating map:

- Rectangle tool (dashed square): Click and drag to select a rectangular area.
- Freeform tool (curved line): Draw a freeform shape around the seats you want to select.
Both tools let you select multiple seats in a single action.
Changing or removing a seat
To remove a selection, click on the selected seat again. If you want to change your choice, simply remove the selection and then click a different available seat.
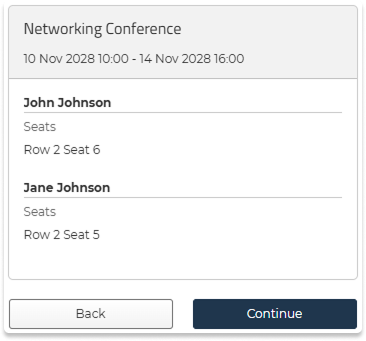
Basket functions
In the basket, you can see the selected seat for each participant.
Step 6: Overview
This page shows your entire order, including (if relevant):
- Participant details
- Selected programme items
- Accommodation
- Chosen options
- Seats
- Total price
If you need to make changes, click Back to return to a previous step.
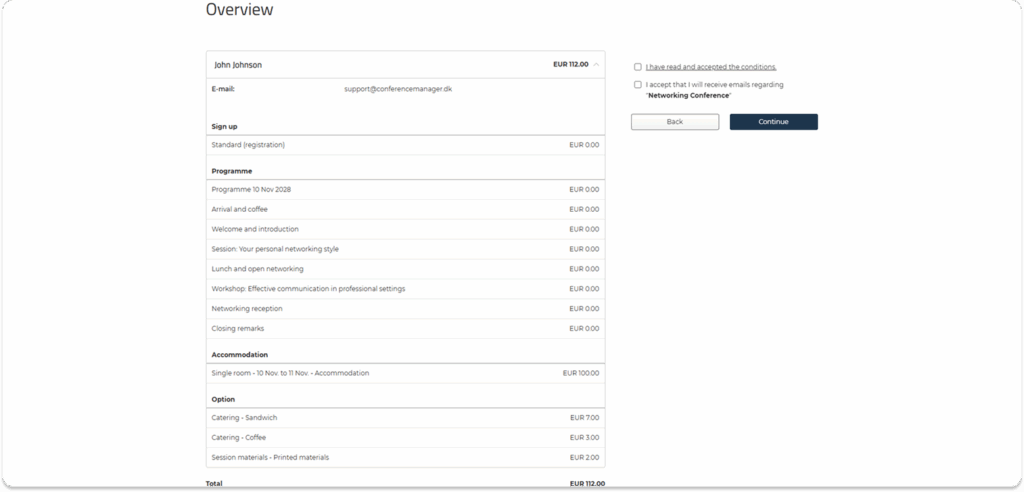
Tick the boxes confirming that you have read and accepted the conditions, then click Continue.
Step 7: Orderer
You might see the Orderer step if the organiser needs information about the person responsible for the order. If not, this step will be skipped automatically.
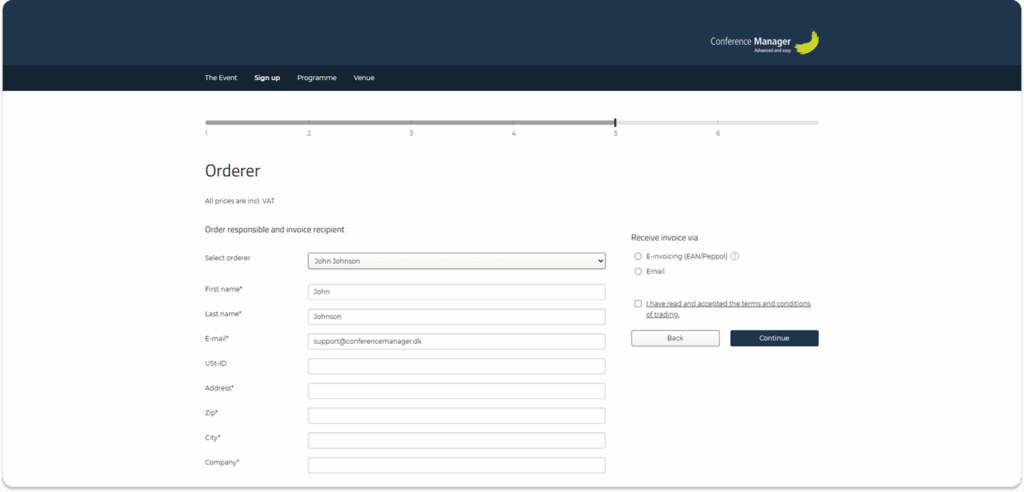
This person will be the formal contact for the order and will receive the invoice, if the event issues one.
Whether you are registering one participant or several, you can choose any of the participants as the orderer — or you can enter a completely different person, such as a colleague or bookkeeper.
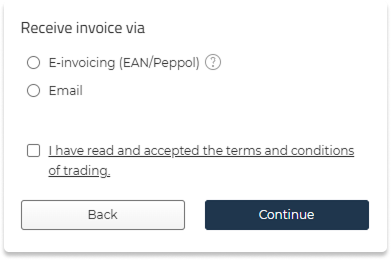
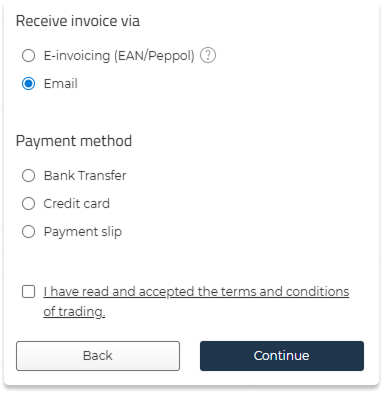
Invoice
If the event is set up to generate invoices immediately, and several invoice types are available, you must choose how you want to receive the invoice, such as:
- Email invoice
- E-invoice (EAN/Peppol)
Payment
If the registration has a cost and payment is required during signup, you may need to choose a payment method if more are available (e.g. credit card or bank transfer).
If you have questions
If you have any questions about the event, your registration, programme choices, accommodation, invoicing or anything else, please contact the event organiser directly.
They are responsible for the event setup and can help you with any details or changes.
You can always find the organiser’s contact information in the footer of the event website: