
You can create certificates in Conference Manager and send them to your participants — for example, as proof of attendance or course completion.
This article shows how to design the certificate, insert dynamic content, and deliver it to your participants.
Create the certificate

- Go to Participants in the top menu.
- Click the Material tab.
- Click Create new material.
- In the new window, enter a name for your certificate.
- Under Type of material, select Certificate.
- Click Create to continue.
Insert content

- Click Add content.
In the Select content window, choose which information and content you want to appear on the certificate.
You can insert for example:
Participant information:
- First name, last name
- E-mail, country
- Participant ID
- Participant category
Event information:
- Event name
- Event date, time or location
- Organiser or company name
- QR code (vCard or event info)

- Use Compile new line to join fields like first and last name.
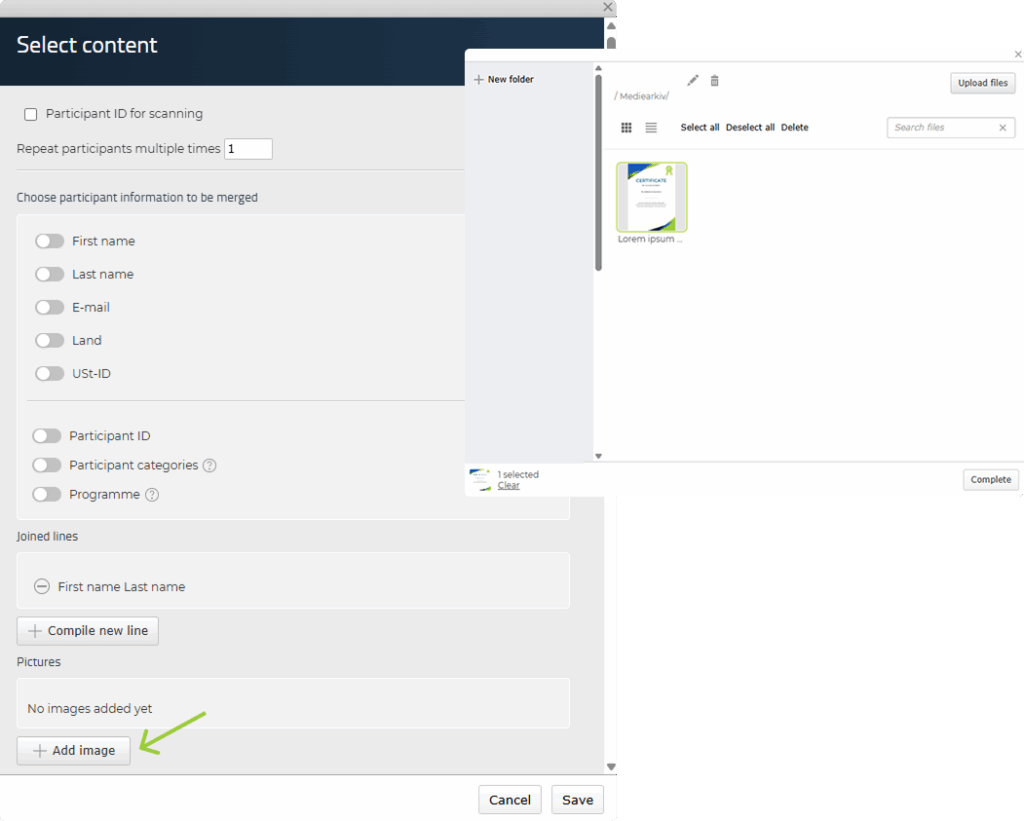
- Use Add image to insert your logo, certificate template or another visual.
Once saved, the content will appear in the editor.
Design and position the content
- Click Design to open the layout editor.
When you open the editor, the content will be placed in the corner.

- Drag and place each element freely on the certificate canvas.

- Click on any item (e.g. a name field) to access its formatting settings.
- Adjust font type, size, and colour if needed.
- Use the Align dropdown to place text left, right, centered or auto.
- Use the Show margins option to define exact spacing from the edges — useful for aligning content consistently.
- Use the Layers panel to manage overlapping elements:

- Drag items up or down in the layer list to bring them in front or behind (for example, place participant names in front of a background certificate design).
- Click Save when finished.
Deliver the certificate to participants
Once your certificate is ready, you can either print it or send it by email — depending on setup and preferences.
Option 1: Print the certificates
- Go to Participants and Material.

- Click Print to PDF below the certificate in the material overview.
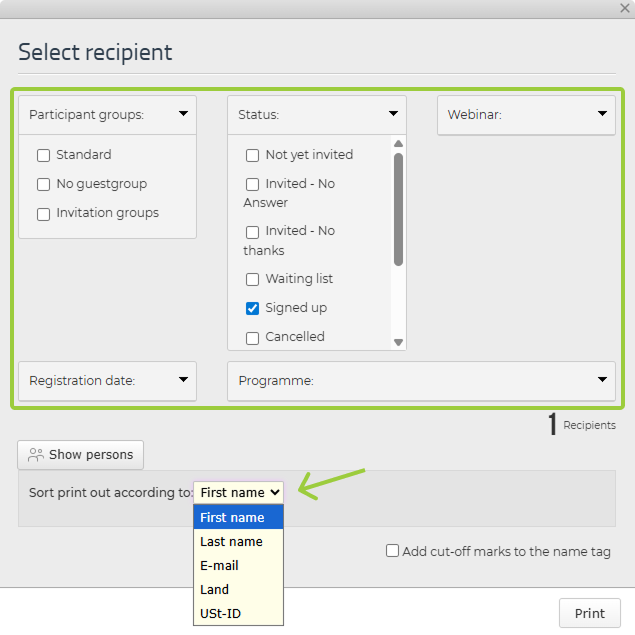
- In the Select recipient window, choose:
- Mandatory: Select Status (e.g. Signed up).
- Optional: Select e.g. Participant categories or Registration date.
- Choose how the certificates should be sorted (e.g. by First name or Company).
- Click Print to generate a print-ready PDF.
Option 2: Send the certificate by email
- Go to Participants and Material.

- In your material overview, activate the certificate.
- Click on the Scheduled dispatches tab.

- Click Create new template to set up an email with your certificate.

- Enter your subject and email message.
- Insert a download link for the certificate:
- Place your cursor and click where the link should go.
- Click Insert link in the toolbar.
- Under Link address, choose Select a page on the website and then select Download material from the dropdown.
- In the Link text field, enter the text that should appear in your email (e.g. “Click here to download”).
- Click Save to insert the link.

- Fill in the Own reference field — this is just for your internal use.
- Click Save.
Your template will now appear under Templates.
To send the email with the certificate:
- Select the email in the overview so it turns green.
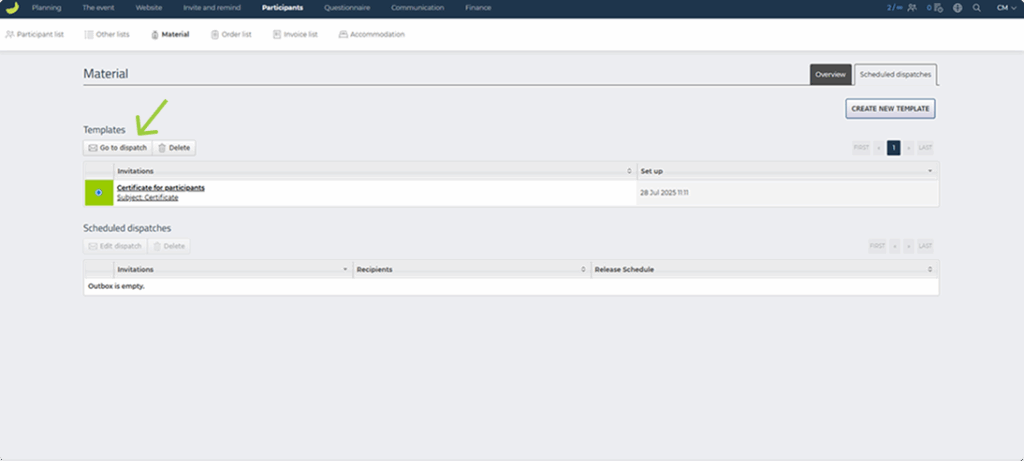
- Click Go to dispatch.
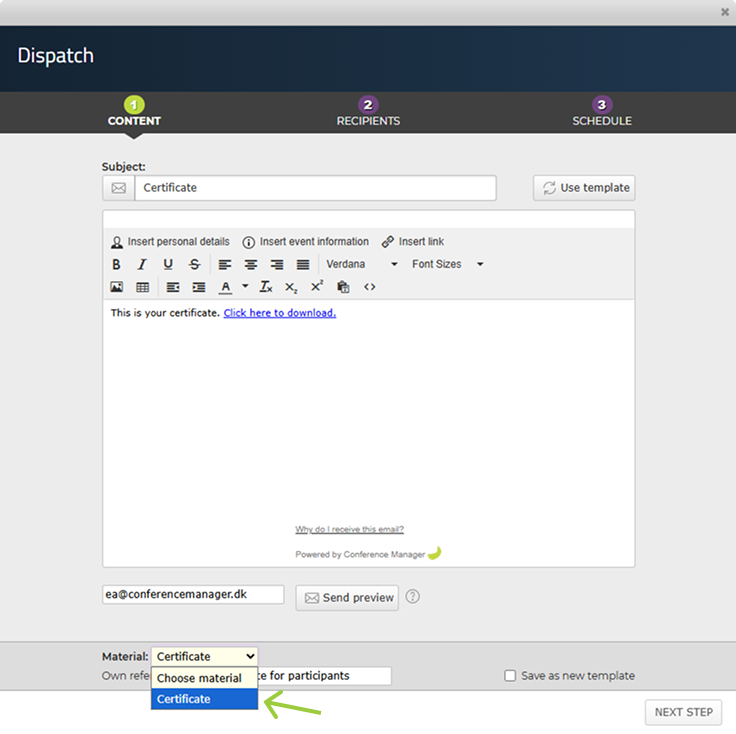
- At the bottom, select the relevant Material from the dropdown (if you have more than one).
- Click Next step.
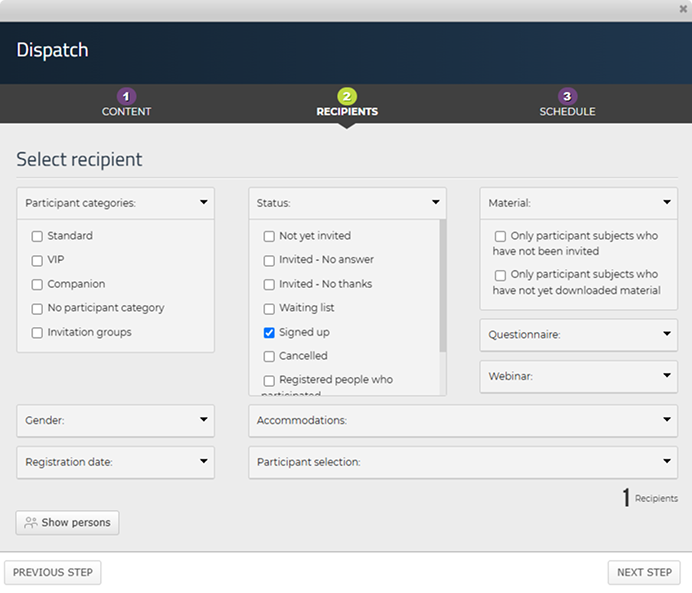
- In the Select recipient window, choose:
- Mandatory: Select Status (e.g. Signed up).
- Optional: Select e.g. Participant categories or Registration date.
- Click Next step.
Choose when the email should be sent
If you want to send it now:

- Under When should mail be dispatched?, select Now.
- Click Send to deliver the email immediately.
If you want to schedule it:

- Select Later and choose a date and time.
- Click Schedule to confirm.