

With an external login, you can give selected people access to certain information in your event that you choose – without giving them access to all content. This ensures that partners or colleagues only see the information they need. Start by enabling external login on your website and then you can create a login.
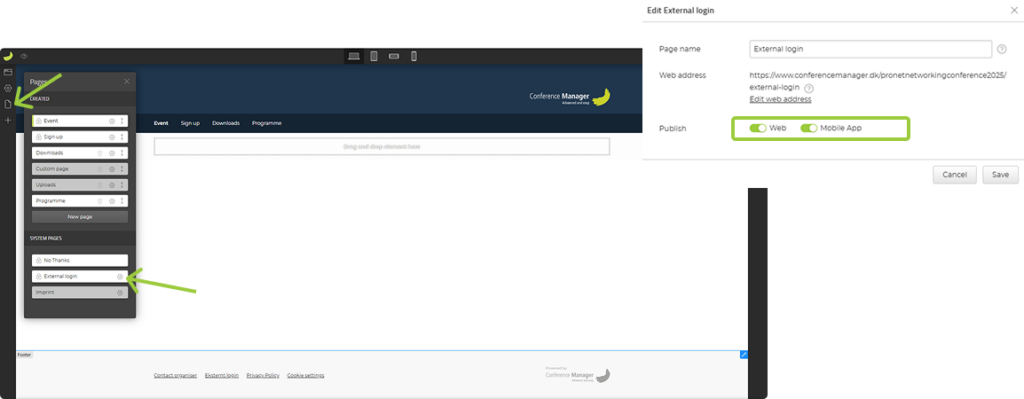
Enable external login on your website
- Click on Website and then Design and activation
- Click Open Website Designer
- Click on Pages (the paper icon) in the left corner
- Find External login under System pages
- Click on Settings (the gear icon)
- Next to Publish, you can choose whether external login should be available on Web, Mobile app or both
- Make sure to save your changes
Once you have done this, you can return to your event and create your external login.
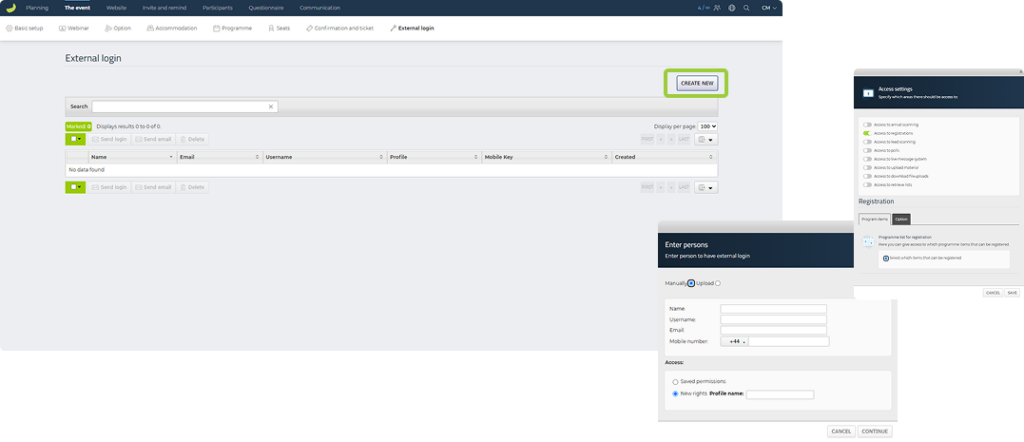
Create external login
- Click on The event and then External login
- Click Create new
- You can now choose to create a login manually, or you can upload an excel file with the details of the people who you want to give access
- Create a Username for the user to log in with and fill in the personal information
- Create a Profile name for this set of access rights, which will be saved and can easily be used again in the future
- Now select which information should be accessible and click Save
Send external login
Once you have created your external login, you can see it in your overview. Now you can send an email to them with their login details.
- Check the box next to the external user you want to send information to
- Then click Send login just above the name
- Now you can write a message and any instructions to the external user and send an email with their login
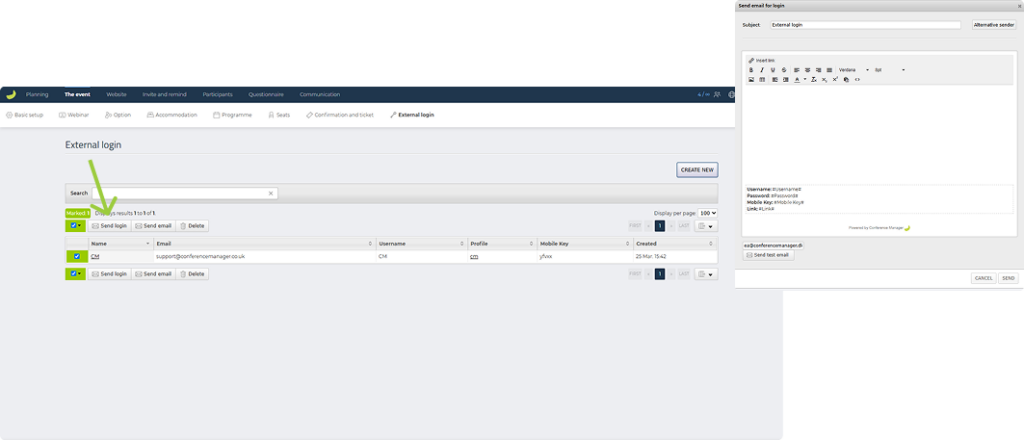
Their login details will automatically appear in the email they receive.