
You can create tickets in Conference Manager using the ticket editor. Tickets can include participant information and QR codes or barcodes for check-in. They are automatically attached to the order confirmation and also available to participants in the CM Events app.
This article shows how to design your ticket, insert dynamic content, and activate it.
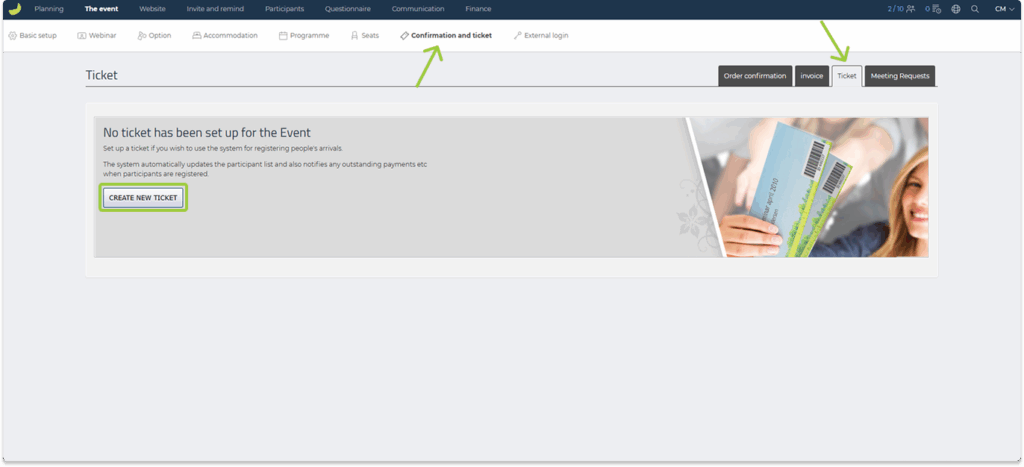
Create the ticket
- Go to The event in the top menu.
- Click on Confirmation and ticket and then Ticket.
- Click Create new ticket.
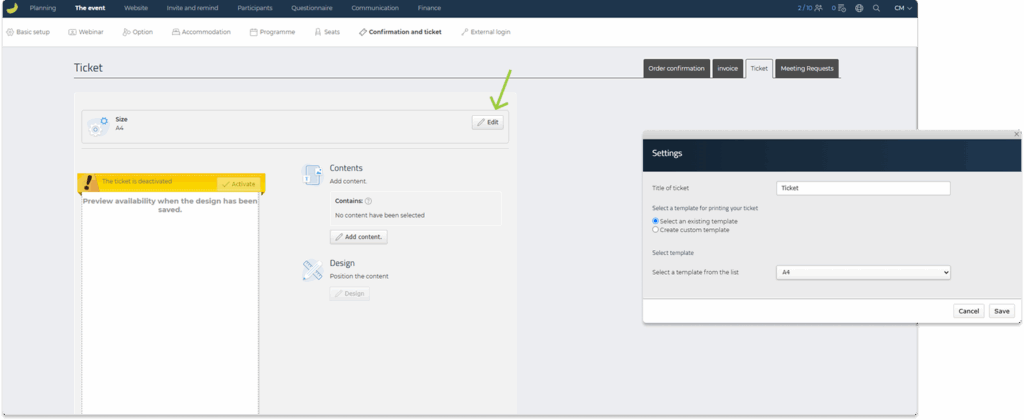
The default ticket size is A4. Click Edit in the top right corner to open the ticket settings and select a different size. You can select an existing template or you can create a new template. Here you can also edit the title of your ticket.
Insert content
You will now be able to add content to your ticket.
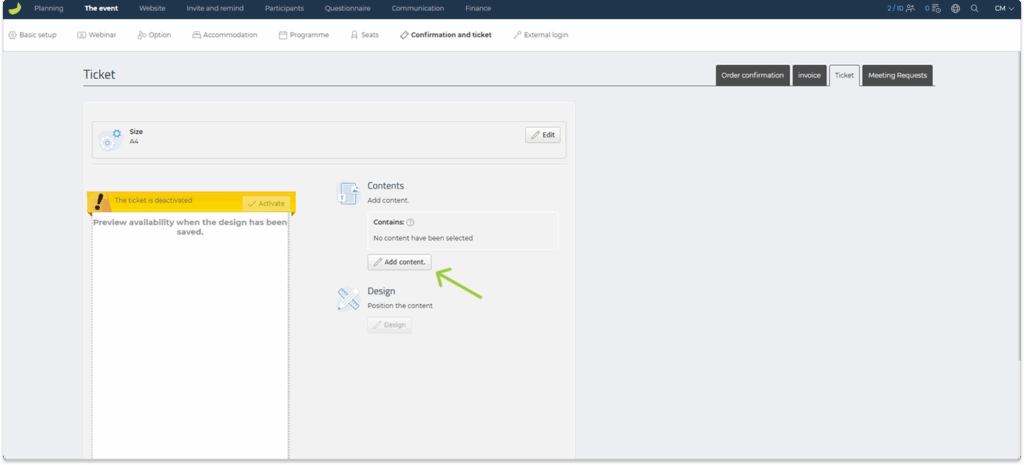
- Click Add content.
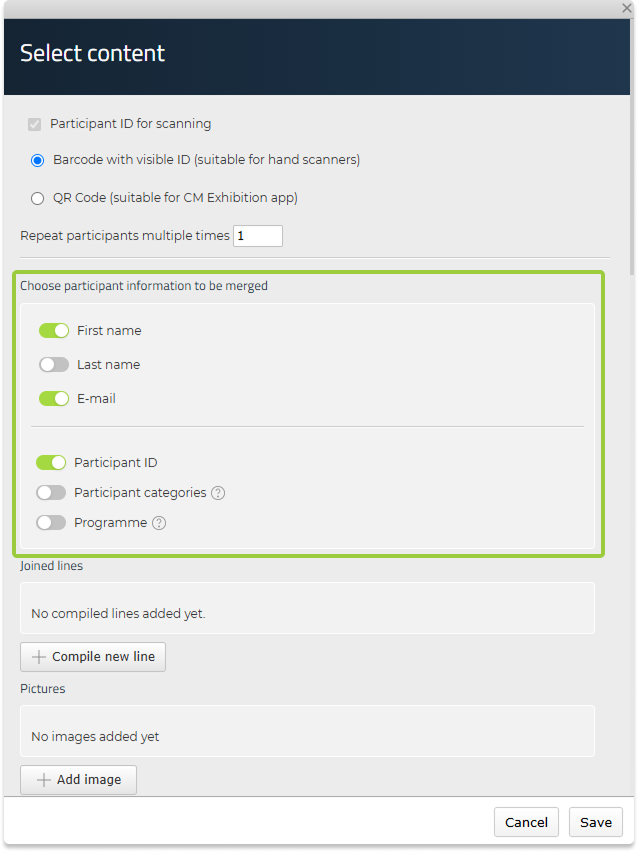
- In the Select content window, you can choose which information and elements you want to include on the ticket.
First choose if you want to add a barcode or a QR-code to your ticket. Both can be scanned with the CM Exhibition app:

You can also insert for example:
Participant information:
- First name, Last name
- Participant category
- Participant ID
Event information:
- Event name
- Event date and location

Other content:
- Images such as your logo or background
- Options
- Free text with extra information
- QR code (e.g. with a link)

Use Compile new line to combine fields like first and last name:
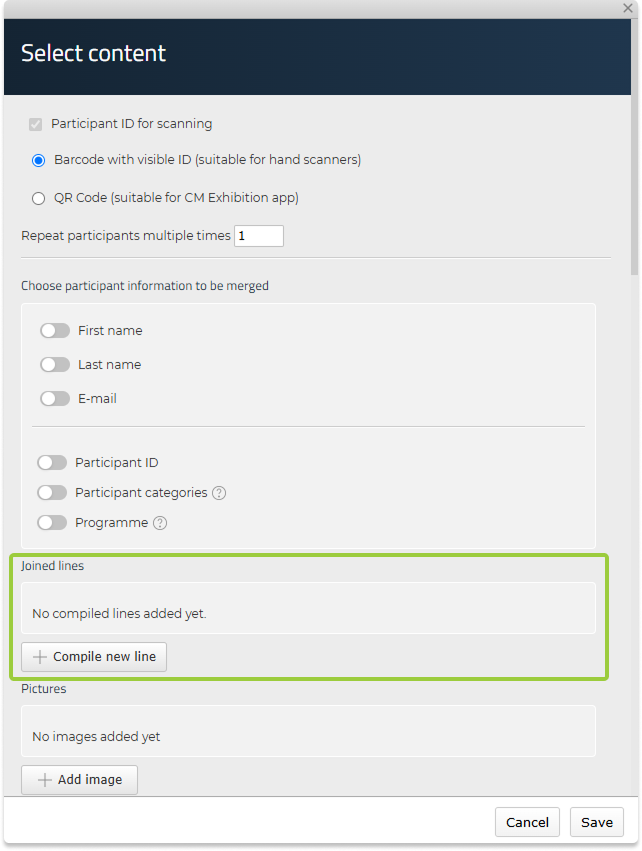
This function automatically adjusts the spacing so the fields are aligned neatly with the right distance between them, regardless of how short or long the names are.
The dynamic fields you add (such as name, email, or event date) act as placeholders.
When the ticket is generated and sent to participants, these placeholders are automatically replaced with the correct information from your event and participant list — making each ticket personalised for the individual participant on the specific event.
Once saved, the content will appear in the layout editor.
Design and position the content
- Click Design to open the layout editor.
When you open the editor, the content will be placed on top of each other in the corner.

- Drag and place each element freely on the ticket canvas.

- Click any item (for example, a text field) to open its formatting options.
- Adjust font type, size, and colour if needed.
- Use Align to position elements left, right, or centered.
- Use the Show margins option to define exact spacing from the edges — useful for aligning content consistently.
- Click Back in the top left corner to exit the specific element and return to Layers.
- Use the Layers panel to manage overlapping elements:

- Drag items up or down in the layer list to bring them in front or behind (for example, place participant names and text in front of a background ticket design).
Click Save when finished.
Tip: You can design a ticket template in an external image editor and upload it as an image in Conference Manager to use it as a background. This way, you can keep a consistent visual design and only insert the dynamic fields (such as participant name, event title, or barcode) that are unique for each participant and event. Just make sure that the background image is placed at the bottom in the layer list, so all other elements appear on top.
The example shown above was created in Canva.
Activate the ticket
When you are finished designing your ticket, remember to activate it:
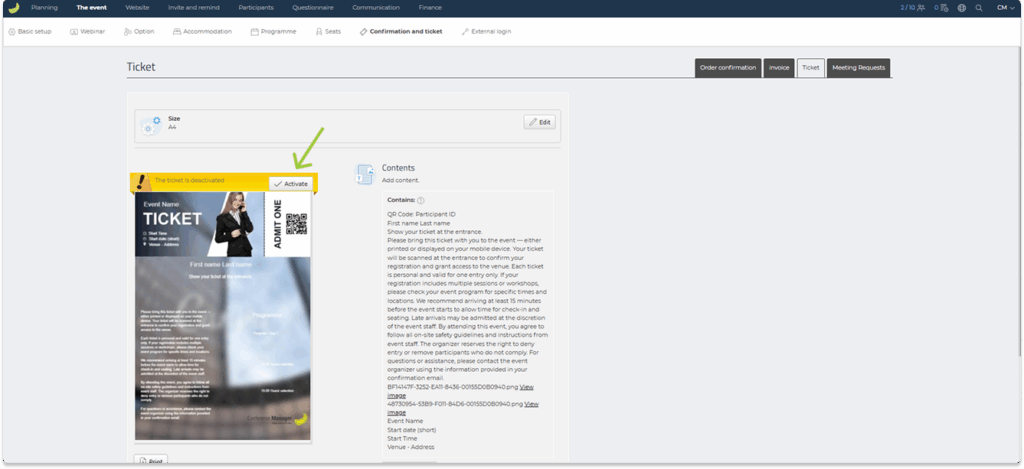
Once activated:
- The ticket will automatically be attached in the order confirmation email.
- Participants can also access their ticket in the CM Events app.
You also have the option to download and print out the participants’ tickets. This you can do without activating the ticket.
Check in participants using their tickets
You can register participants’ arrival by scanning their ticket at the entrance with the CM Exhibition app.
Each ticket includes a unique barcode or QR code that identifies the participant and marks them as arrived in your event. Click here to read more about how to access the CM Exhibition app.
If you use tickets for arrival registration, you can also use onsite print to print out your name tags. When participants scan their ticket, their personalised name tag can be printed automatically. Click here to read more about onsite print.
In addition to arrival registration, you can also use the CM Exhibition app for participant registration to scan tickets and confirm attendance at specific options or programme items. This allows you to manage access to different choices directly on-site.