
If you have received an external login for Conference Manager from an organiser, you can use it to access an event and the data that the organiser has shared with you. This guide shows you step by step how to log in for the first time and how to use your access on desktop.
If you want to learn more about how to use external login in our CM Exhibition app, click here to find a guide.

If you cannot log in, or if you do not see the rights you expect, please contact the organiser of the event.
Step 1: Open the email with your login details
You will receive an email from Conference Manager with:
- Your username
- Your temporary password
- A mobile key (for the CM Exhibition app only)
- A link to the login page
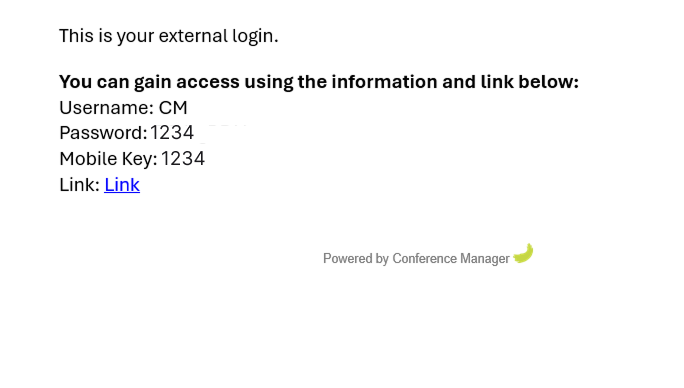
Click the link in the email to open the login page.
Step 2: Enter username and temporary password
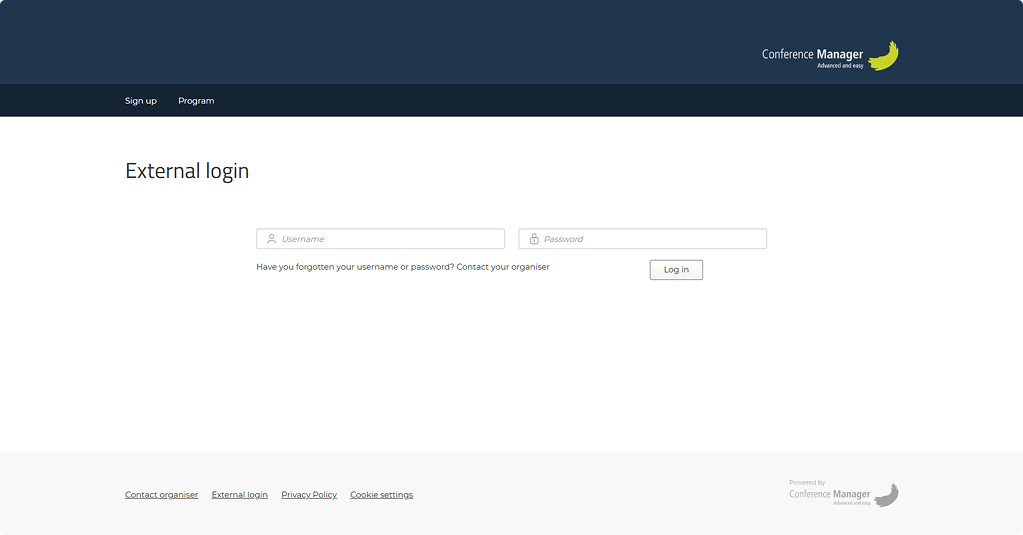
- On the login page, type your username and the temporary password from the email.
- Click Login.
Step 3: Create your own password
The first time you log in, you will be asked to create your own password.
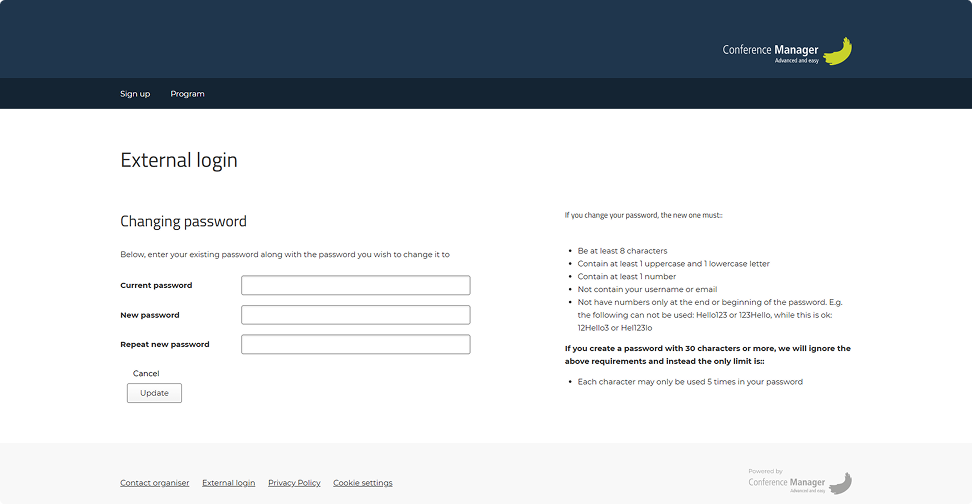
- First, enter the temporary password you received.
- Then enter a new password and confirm it.
- Click Update to complete.
From now on, you will use your new password when logging in.
Step 4: Set up two-factor authentication
After you create your new password, you will be asked to set up an authenticator app (for example, Google Authenticator or Microsoft Authenticator).
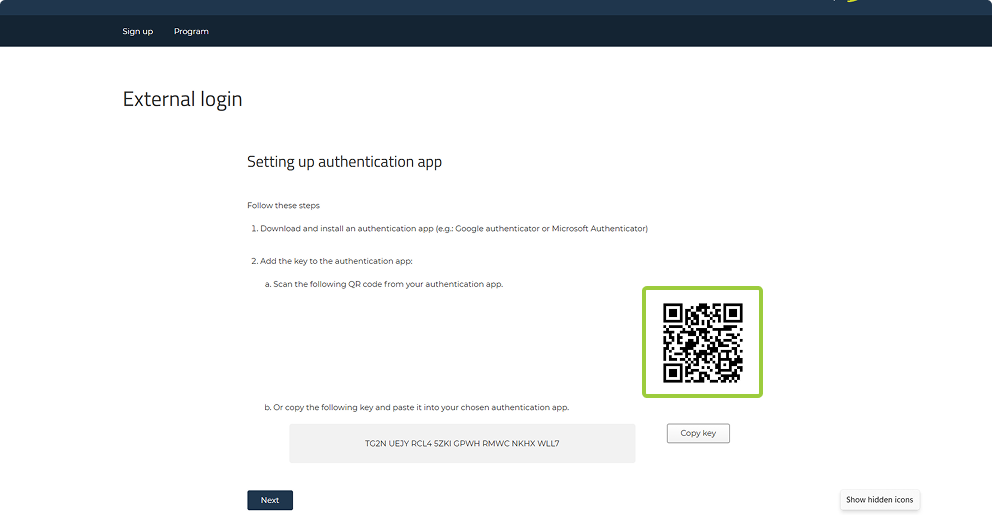
- Download and install an authenticator app on your mobile device, if you don’t already have one.
- Open the app and scan the QR code shown on the screen, or manually enter the key code displayed.
- The app will now generate a one-time 6-digit code that refreshes continuously.
Step 5: Enter the code from the app
- Type the 6-digit code from your authenticator app into the field on the screen.
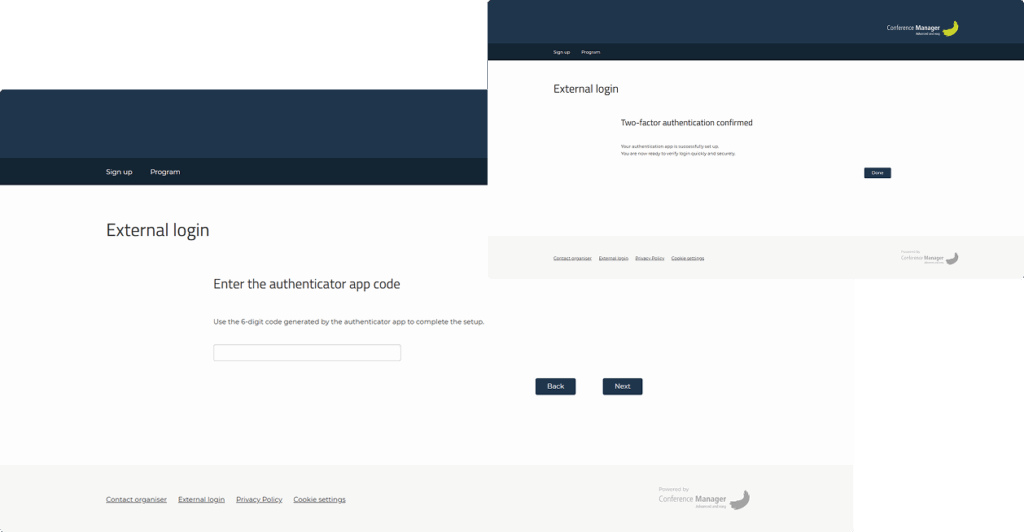
- Click Next and then Done to complete the setup.
Step 6: Log in with your new password
- Enter your username and your new password.
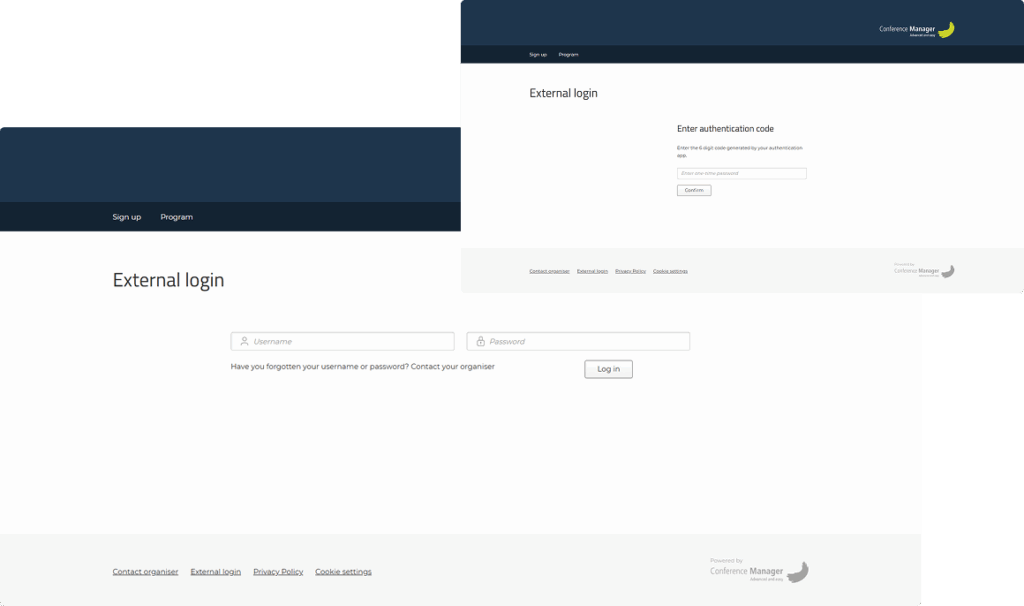
Since you are now logging in for the first time on your IP address, you will be asked to enter a code from your authenticator app again.
From now on, always use your new password and the code from the app when prompted.
Step 7: Use your external login
Once you are logged in, you will see the content that the organiser has given you access to.
In the menu on the left, you can navigate between different sections such as Lists, Arrival registration, Materials for participants, Uploads from participants, Polls or Live messages – depending on what you have been given access to.
Lists
If you have access to Lists, you can download participant, registration, or other assigned lists.
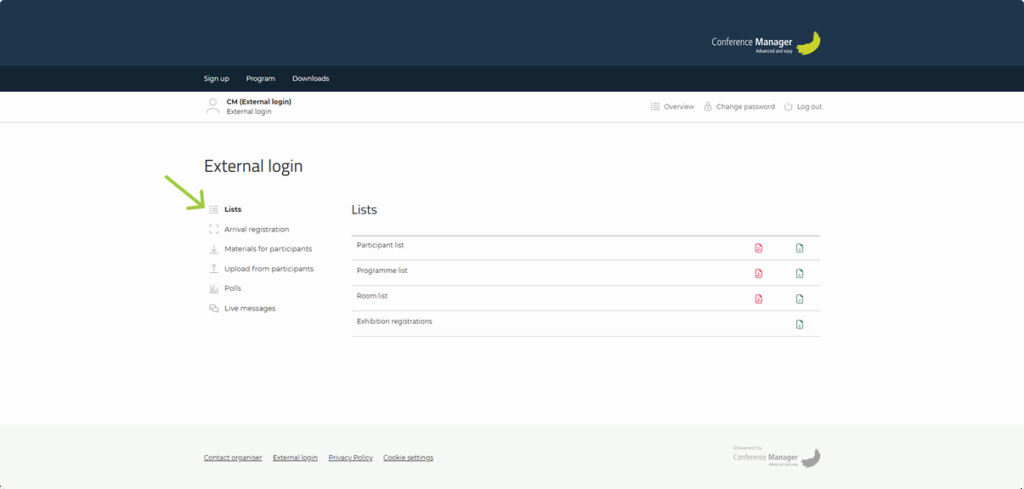
- Click the paper icons to download a list as either a PDF or an Excel file, depending on your needs.
Arrival registration
If you have been given access to Arrival registration, you can see which participants have been registered upon arrival.
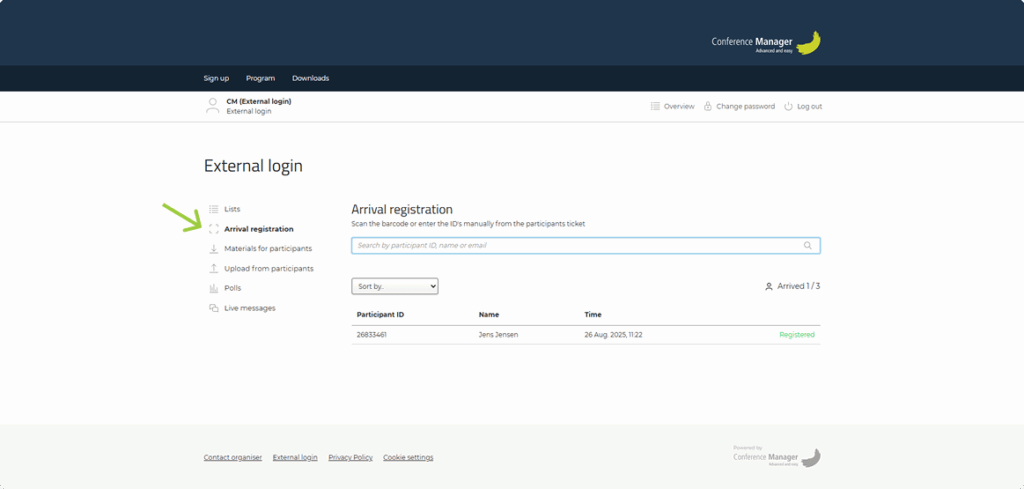
- To register more participants, search by participant ID, name, or email and click on Register.
- When a participant is registered, they will appear in the list with a status of Registered.
Arrival registration works well in the CM Exhibition app. Click here to find a guide.
Materials for participants
If you have been given access to Participant materials, you can upload files to specific programme tracks, that the participants can then download from the programme.
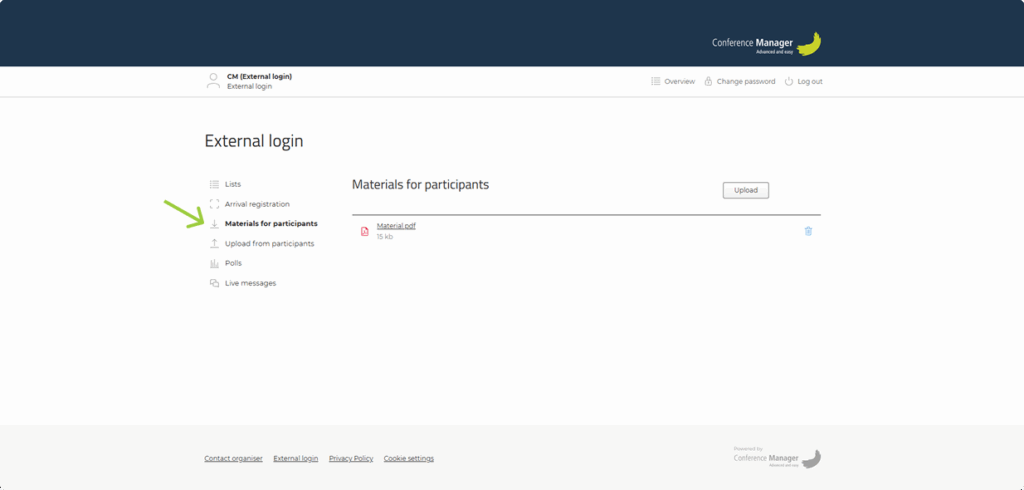
- Click Upload to add new files.
- Click Select a file, choose your file and check off the programme tack that it should be linked to.
- Click Upload to save.
- When you have uploaded files, you can click on the trash can icon to delete them if necessary.
The files will only be visible to the participants if they are linked to a specific programme tracks, meaning that if there are no programme tracks on the event, the participants will not be able to see the files. The files will always be visible to the organiser though.
Uploads from participants
If you have been given access to Uploads from participants, you can see files uploaded by participants.
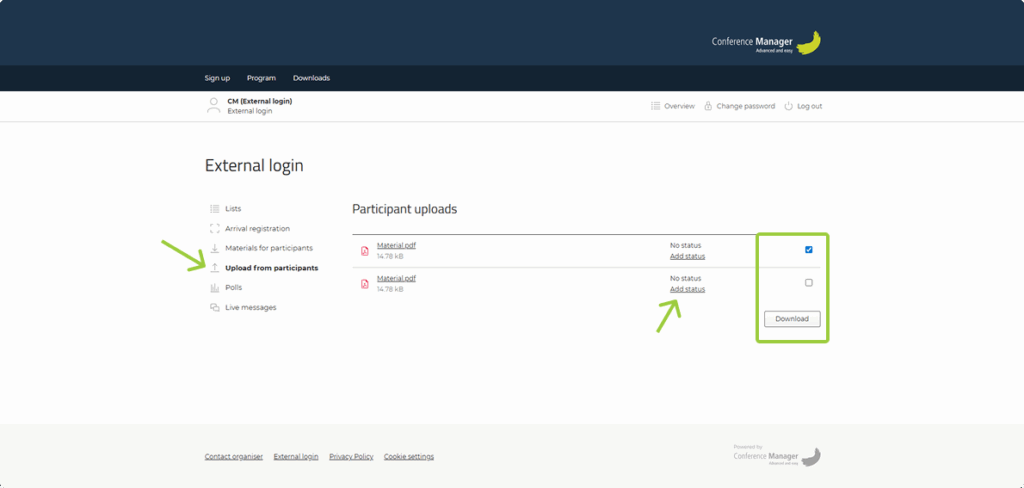
- Tick the box next to the files you want to download and click Download.
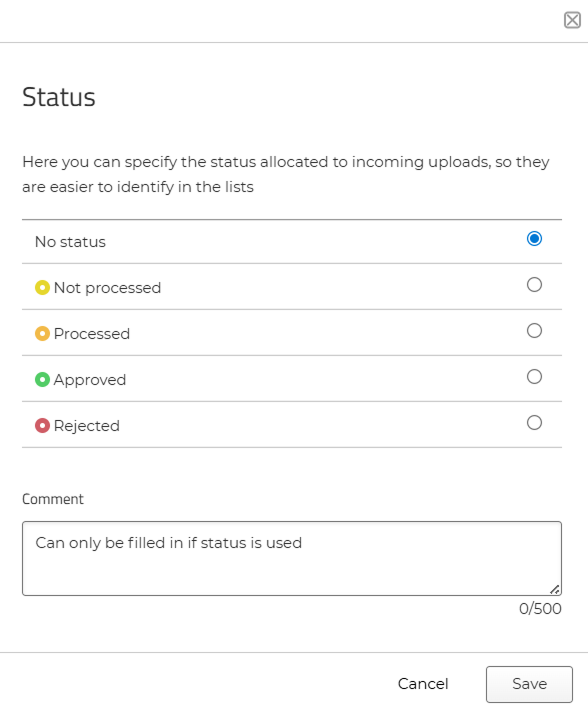
- Once you have reviewed the file, you can assign a status by clicking Add status (e.g. Approved or Rejected).
- You can also add a comment when setting the status.
The organiser can then track the status of the files.
Polls
If you have been given access to polls created by the organiser, you can start them directly from your external login. You can use the dropdown menu to sort polls by Created, Title, Last run, or Question, if there are several. Simply find the poll you want to run and click Start.
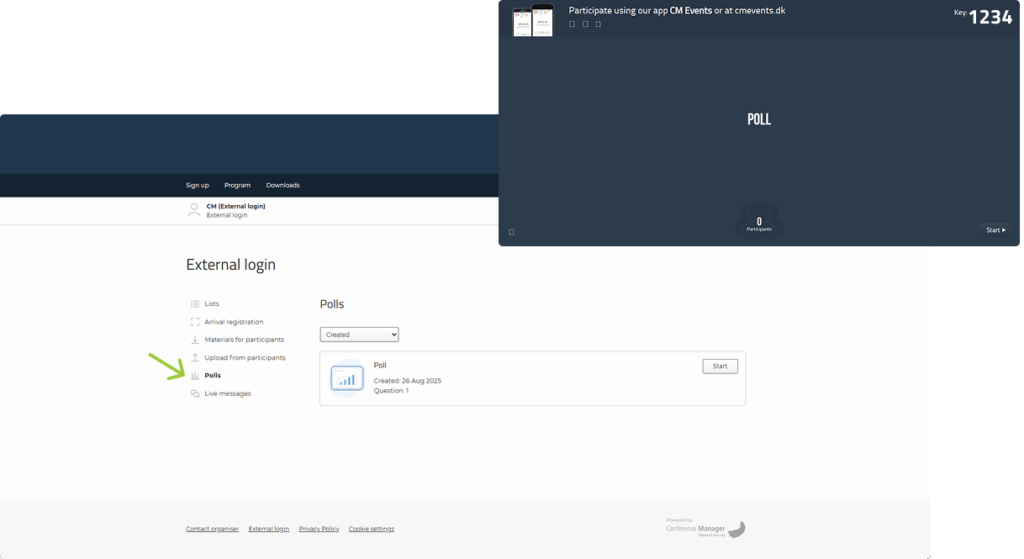
- The poll can be shown on a big screen during the event, where participants can join and vote either by:
- Typing in the key shown on the screen in the CM Events app.
- Going to cmevents.dk and typing in the key and opening the session in a browser.
Results can be shown live on the screen after the voting.
Click here to find a guide for the CM Events app.
Live messages
If you have been given access to Live messages, you can start a live Q&A session by clicking Start a new session. This will open a new window with the Q&A.
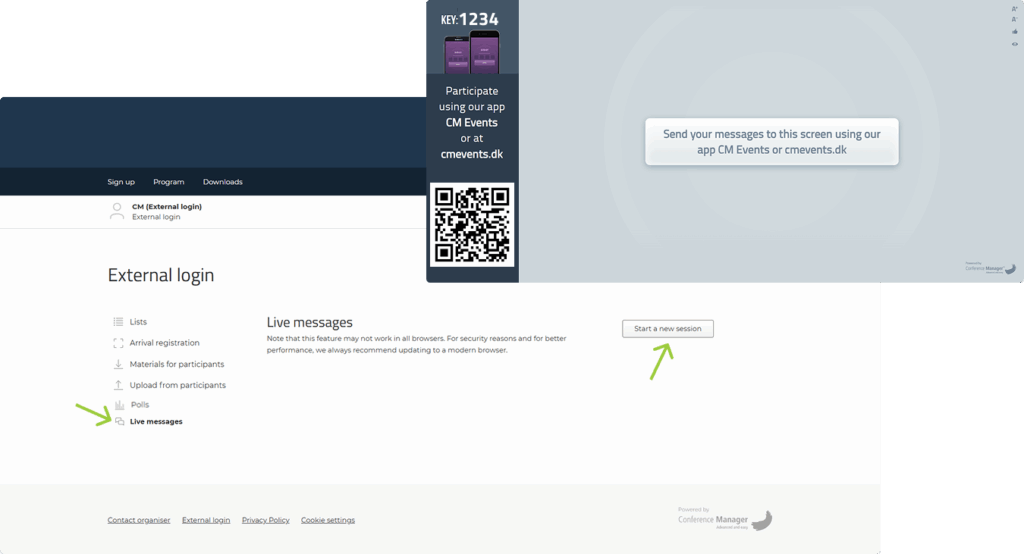
- The Q&A can be shown on a big screen during the event, where participants can join and submit their questions either by:
- Typing in the key shown on the screen in the CM Events app.
- Scanning the QR code with their phone camera and opening the session in a browser.
- Going to cmevents.dk and typing in the key and opening the session in a browser.
Click here to find a guide for the CM Events app.
Step 8: Log out
Remember to log out, especially if you are using a shared computer.
- Click Log out in the top right corner.