
Arrival registration lets you check participants in when they arrive at your event. You can confirm that they have a valid ticket or access, and you can afterwards track who attended your event.
Arrival registration using the CM Exhibition app allows you to scan QR codes or barcodes and register participants manually by search using a mobile device.
Create access for arrival registration
To use the CM Exhibition app for arrival registration, you need to create an external login with access to arrival registration.
Create an external login
- Go to The Event and then External login.

You may be asked to activate the External login page in the Website Designer: A message will appear with a link that redirects you to the Website Designer. This step is not needed if you simply want to arrival register using the CM Exhibition app.

If the external login also needs access to log in to your event via browser, you can 👉 click here for a quick guide on how to activate the External login page.
👉 Or click here to read more about how you can use external login in browser.
- Click Create new.

- Enter name, username (defined by you) and email of the person who will check participants in. You can also create an external login for yourself.
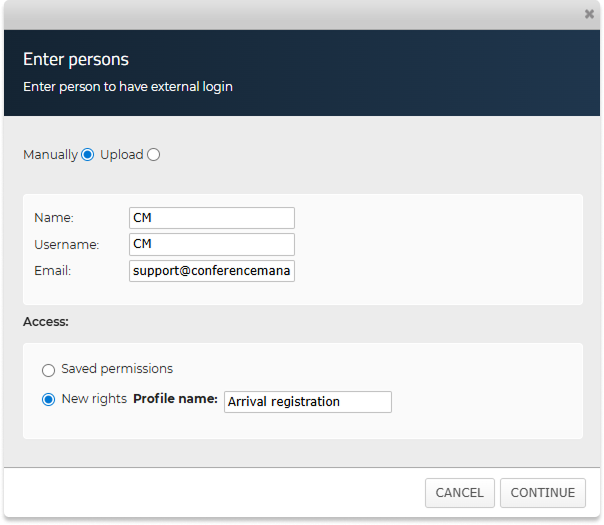
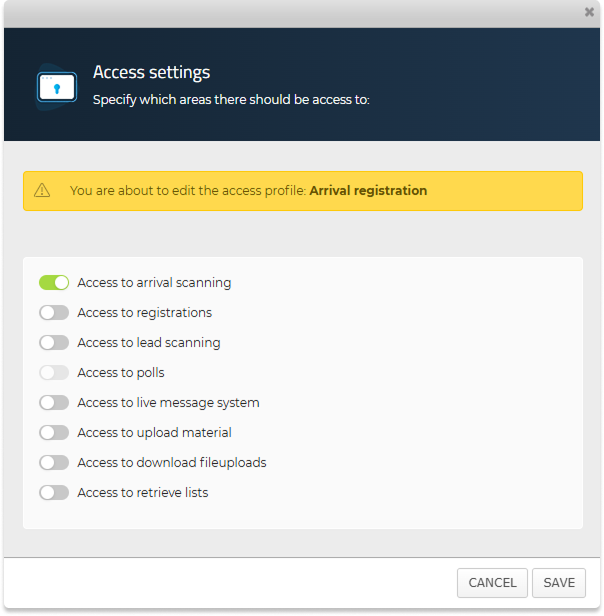
- Under Profile name, write a descriptive name for the permissions such as Arrival registration.
- Click Continue.
- Tick Access to arrival scanning.

- Click Save.
Create more logins with the same access
If multiple people will check in participants, you can create additional external logins:
- Click Create new again.
- Choose Saved permissions.
- Select the profile you created earlier, e.g. Arrival registration.
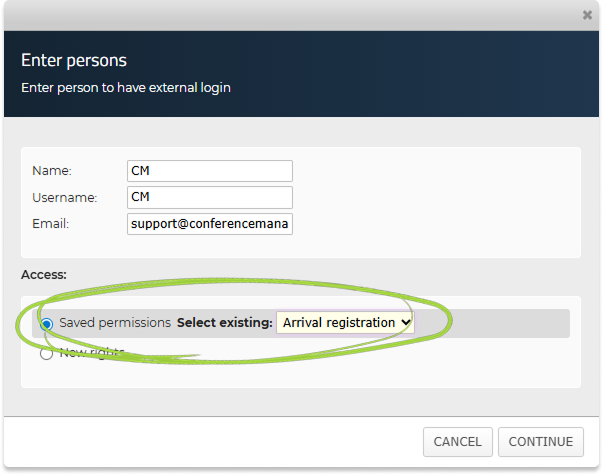
- Click Save.
Create multiple logins at once
You can also create several external logins at once by uploading an Excel, CSV or .txt file containing names, usernames and email addresses.
- Click Create new.
- Choose Upload instead of Manually.
- Click Choose file and select the file from your device.
- Click Upload.
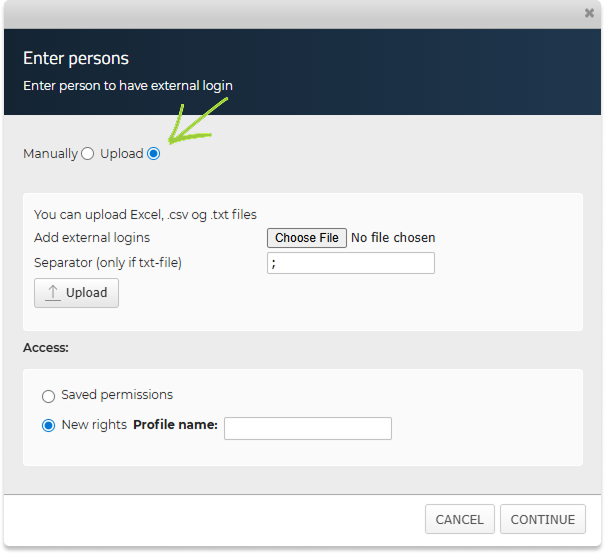
- Click Continue.
- Match each field with the correct columns from your file using the dropdown menus.
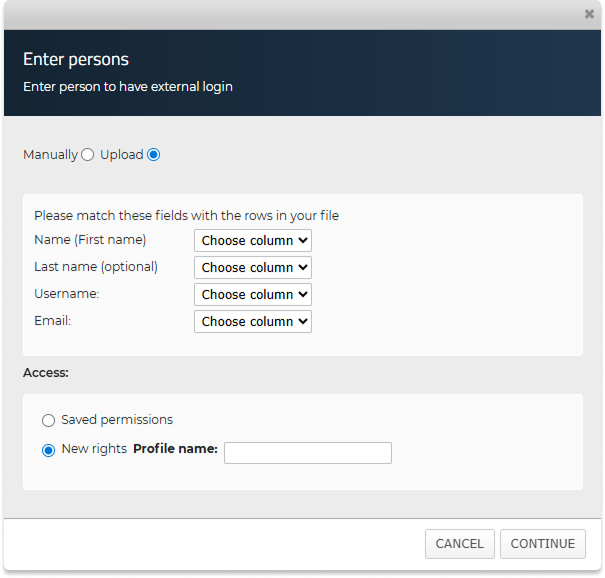
- Select which access the logins should have. You can create new permissions or use a saved access profile.
- Click Continue.
- Review the access profile that will be applied. If needed, you can edit the permissions before saving. Note that any changes apply to the entire access profile and therefore affect all external logins that use it.
- Click Save.
Get a mobile key
You need a mobile key to perform arrival registration in the CM Exhibition app. Once the external login has been created, there are two ways to access it.
If you will do the arrival registration
- Go to The Event and External login.
- Locate your login in the list.
- Find the Mobile key.

If colleagues or partners will do the arrival registration
If colleagues or partners are performing the arrival registration, you need to provide them with their mobile key so they can log into the CM Exhibition app.
You can either:
- find their mobile key in the external login list and share it with them, or
- send them an email with their login details, which includes the mobile key.
To send login details:
- Tick the person on the list.
- Click Send login.
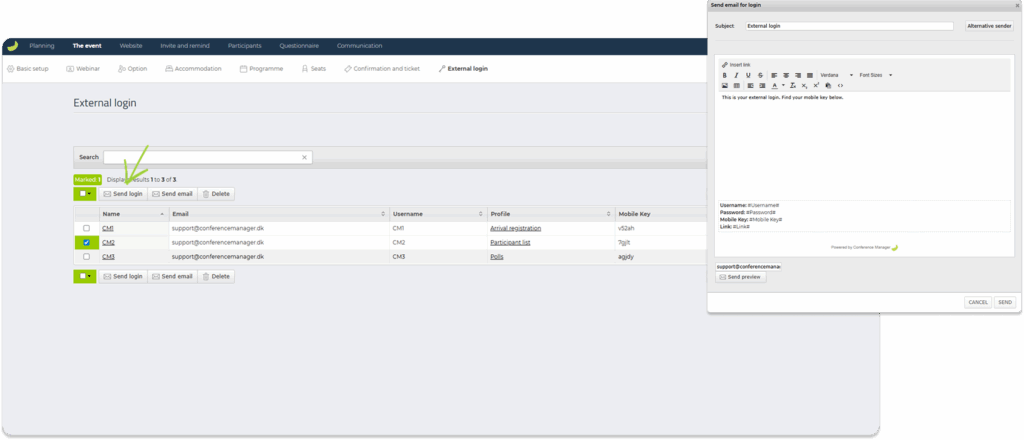
- Write a subject and message.
- Click Send.
The email automatically includes:
- Username
- Temporary password
- Link to the external login page
- Mobile key
Username, password and link are only relevant when logging in via browser. Only the mobile key is needed to log into the CM Exhibition app.
Arrival registration via scanning in the CM Exhibition app
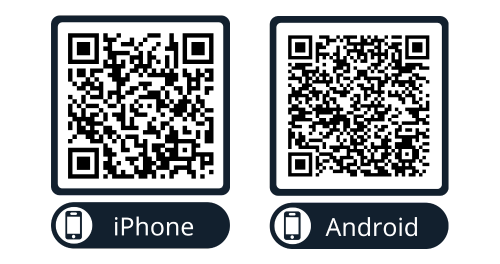
- Download CM Exhibition from the App Store or Google Play.
- Enter the Mobile key.
- Choose Arrival registration and allow camera access.
- Scan participants’ codes to check them in.

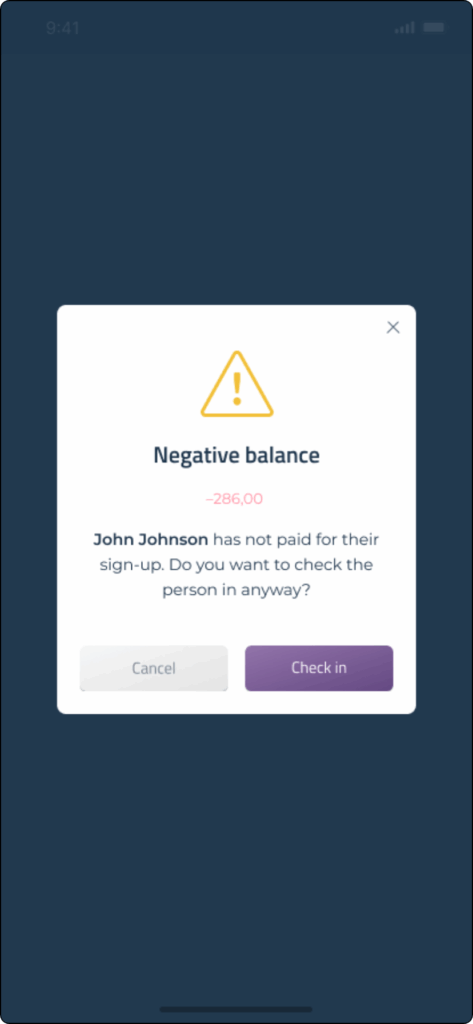
- The app will notify you if the participant has any outstanding payments.
- Click Check in to register their arrival.
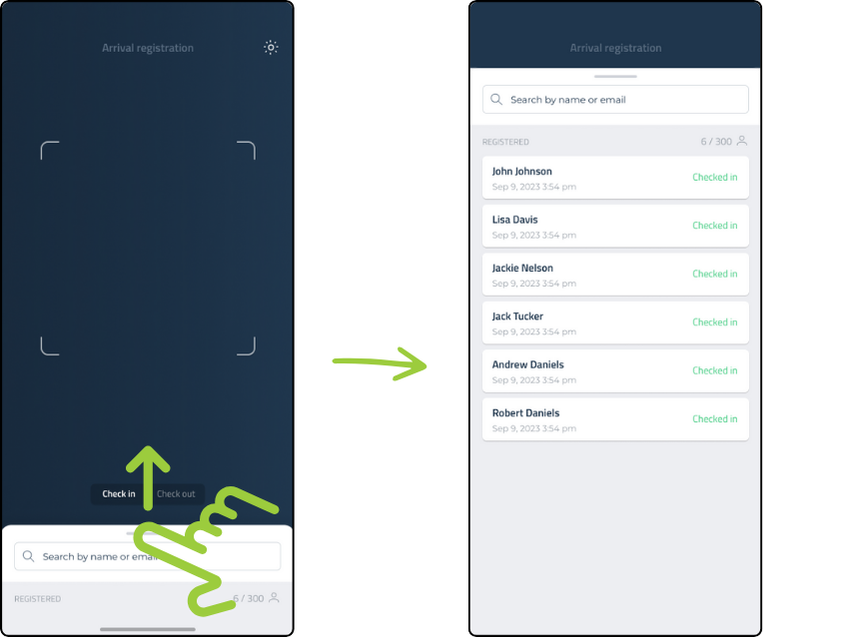
- You can swipe up on the search field to view participants already checked in.
QR code or barcode required for scanning

Arrival registration via scanning requires a QR code or barcode.
Participants can present their code:
- on their ticket (PDF or printed)
- inside the CM Events app
You can also include the QR code in the order confirmation or in an email, but participants will only be able to view their ticket in the CM Events app if an actual ticket with a QR code or barcode has been created.
👉 Click here to learn how to create a ticket in Conference Manager.
QR codes vs barcodes
- The app supports both.
- QR codes are recommended for the app because they scan faster and more reliably.
Arrival registration via manual search
You can also register arrivals by searching manually — simply use the search field at the bottom of the screen to look up participants by name or email and register them.

- Search for the participant.
- Click on their name.
- Click Check in.
Check participants out
If you want to check out participants you have already checked in, simply switch to Check out at the bottom of the screen and scan them (or search for them) again.

View attendance after the event
When you use arrival registration at your event, you can later view who actually attended your event. The participant list gives you a clear overview of each participant’s attendance status.
- Go to Participants and Participant list.
- Look at the Status column.
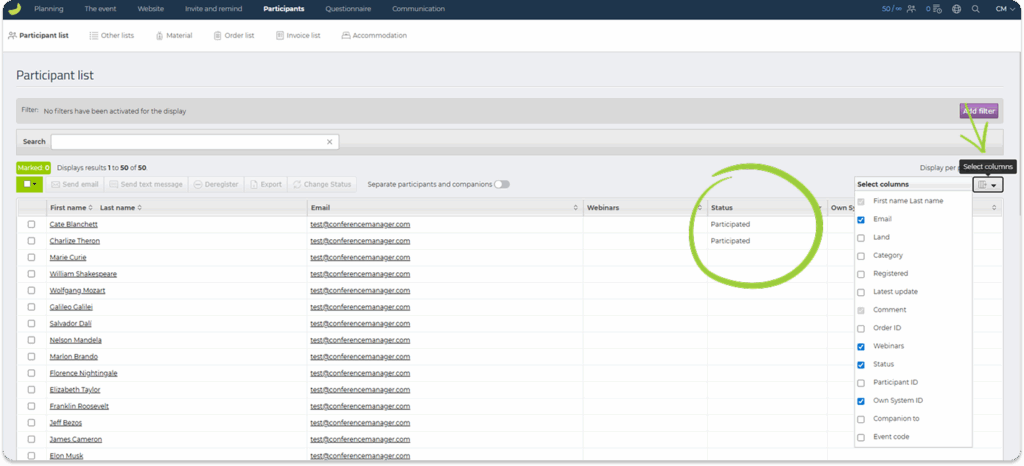
If you don’t see the Status column, click Select columns on the right side of the table and enable Status.
The Status column will show:
- Participated – the participant has been checked in upon arrival.
- Did not participate – the participant has been checked in and then checked out again.
- Blank/empty – no arrival has been registered.
Participants who were not checked in at arrival will not automatically receive the status Did not participate. Their status simply remains blank. The system does not assume they were absent unless they were checked in and then checked out, or you actively choose to mark them as such.
If you want to give participants the status Did not participate — or change any existing status — mark them on the participant list and click Change status and choose a new status.

Important to note
- For the best scanning performance, make sure you have a stable network connection at the venue.
- If several people are scanning, each scanner should use their own external login/mobile key — we do not recommend scanning using the same login on multiple devices.