



Five example emails built in the email editor: an invitation, practical information, a programme, a welcome email for speakers and a save the date. Each example shows the finished email, how it is structured and how to build it step by step. Everything is made with the standard Blocks, so you can rebuild the examples in your own event and replace the text, images and colours with your own.
The examples assume you know the basics of the email editor. If you have not used it before, start with the article Create email with email editor. Turn on View components while you build. The dashed boundaries make it easier to see which Section, Column or element you have selected.
How the emails look on mobile
On a mobile phone, all Columns in a Section are shown one below the other, and each Column fills the full width. The widths you set for the Columns only apply on a computer. The Columns keep their order from left to right, so in Example 5 the text comes before the image in the second row. Tablets usually show the email as on a computer. The editor does not have a mobile preview, so always check the email on a real phone before you send it.
Send a test email to yourself and open it on both your phone and your computer. If you can, also check it in more than one email client, such as Outlook, Gmail and Apple Mail, because they show emails in slightly different ways.
You can see the mobile view on your computer. Open the test email in Outlook on the web (outlook.office.com) or Gmail in your browser. Right-click the email and select Inspect, or press F12. Click the icon with a phone and a tablet at the top of the panel, or press Ctrl+Shift+M, and choose a phone at the top of the page.
Example 1: Invitation with three columns
A bold invitation with a dark header, a large image and three short selling points. The button leads straight to registration.

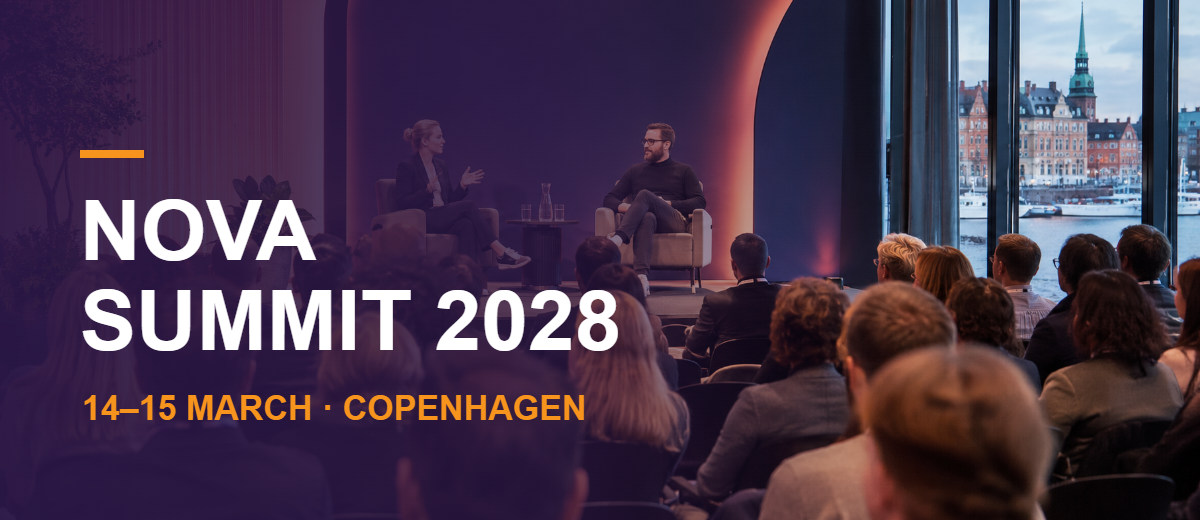
Join us at Nova Summit 2028
Hi First name,
You are invited to Nova Summit 2028 in Copenhagen on 14–15 March. Two days of talks, hands-on workshops and time to meet people who work on the same problems as you.
Registration closes on 1 February 2028.


- Header: Drag Two columns to the top. Give the Section the background colour #2A1747. Add the logo as an Image in the left Column. In the right Column, write the date in the Text element and align it to the right. In dark mode, some email apps turn the dark background light, but the logo stays the same. Use a logo that can be read on both a light and a dark background.
- Hero image: Add One column and replace the Text element with an Image. The hero image in this example is made in Design studio: a photo with the event name and date on top, in the size 600 × 260 px. Text that should be on top of a photo must be part of the image.
- Text: Add One column. Write the headline and the greeting with the placeholder First name. Write the body text in a new paragraph. To style the headline, double-click inside the text, select the headline and select the brush in the inline toolbar. The headline becomes its own Text element. Select it, open Style Manager Typography, and set Font size to 30 px, Font weight to Bold and Font color to #2A1747.
- Three selling points: Add Three columns. In each Column, drag a Divider above the Text element and give the line the colour #F7941D under Decorations. Write a short bold heading and one line of text in each Column.
- Button: Add One column and drag in a Button. Write “Register now”, choose an Internal link to the registration and give the button the background colour #F7941D. The button looks raised because of a 3D border: select it, go to Style Manager Decorations Border, set Width to 4 px, choose Outset in Style and choose the same orange in Color. Add a Text element below with the registration deadline.
- Social icons: Add One column with the background colour #2A1747. Replace the Text element with a Social group, choose the platforms and enter the address of each profile in Link (URL).
Not all email clients show the 3D border. Outlook on Windows shows a plain orange border, so the button still looks fine there.
How to make this hero image
Create a hero image with text in the exact size used in the email.
Show the 6 steps
The colours and sizes are the ones used in this example. Choose your own.
- Choose Email One column (600 px) and set the height. In this example it is 260.
- Add the photo and drag it so it covers the whole canvas.
- Select Add colour tone and choose a colour, a direction and a strength. In this example: #2A1747, From the left, 85 %.
- Select Add shape, then Make it a line, and choose a colour. In this example: #F7941D.
- Select Add text for the event name, and again for the date. In this example the name is Bold, 42 px, white, with Capital letters, and the date is Bold, 17 px, orange.
- Select Download and add the PNG as an Image in the email.
Example 2: Practical information before the event
Everything the participant needs the week before: venue, times, the ticket, the app and a way to cancel.
Everything you need for next week
Hi First name,
We look forward to seeing you at Nova Summit 2028. Here is what you need to know before you arrive.
Center Boulevard 5
2300 Copenhagen S
Day 1 ends 17:30
Day 2 ends 16:00
Before you go
- Bring your ticket. You can show it on your phone.
- The nearest metro station is Bella Center (M1).
- The cloakroom is free.
Your ticket is attached in your order confirmation. You can also add it to your phone’s wallet.
Can’t come after all? Cancel or change your registration so someone on the waiting list can take your place.
- Header and text: Build the header in the same way as in example 1, with the background colour #2A1747. Add the headline, greeting and body text in a Section with One column.
- Venue and times: Add Two columns. Write “VENUE” and the address in the left Column, and “TIMES” and the times in the right Column. Give the Columns the background colour #F3F4F7 in Style Manager.
- Two buttons: Drag a Button into each Column below the text. “Find your way” uses Link (URL) with a Google Maps link to the venue. “See the programme” uses an Internal link to the programme. Both buttons have the background colour #F7941D.
- Bullet points: Add One column with a bold heading and a bulleted list.
- Add to Wallet: Add One column and replace the Text element with a Wallet banner. The banner has fixed text and a button that opens View and manage registration, where the participant can download the wallet pass. The Block is only available when Wallet Pass is turned on.
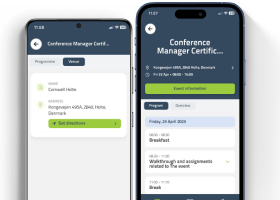
- App banner: Add One column and replace the Text element with an App banner. Give the Section the background colour #2A1747 and make the text in the banner white.
- Cancellation: Add One column and write the text. Select the words that should be a link, select Links in the toolbar and choose View and manage registration.
Example 3: Programme
A programme sent before the event, with the participant’s own workshops marked in bold.

Your programme
Green Cities Conference · Aarhus · 6–7 September 2028
Hi First name,
The programme is final. Your workshop choices are marked in bold. All sessions take place at Aarhus City Hall.
09:00 – Registration and coffee
09:30 – Opening: cities after the heatwave
11:00 – Workshop A: green roofs at scale
12:30 – Lunch
13:30 – Panel: who pays for climate adaptation?
19:00 – Conference dinner
09:00 – Site visit: the new harbour park
11:30 – Workshop D: rainwater in public spaces
13:00 – Lunch and closing remarks
Changes to the programme are shown in the CM Events app as soon as they happen.
- Header: Add One column with the background colour #1E4D3A. Insert the logo as an Image and write the headline and date below in white.
- Day heading: Add One column. Write the day in small bold capitals with the colour #2F7A55. Drag a Divider below and give the line the colour #1E4D3A.
- Programme: Add One column. Write each item on its own line as “09:00 – Registration and coffee”. Make the time bold and give it the colour #1E4D3A with the brush. Make the titles of the participant’s workshops bold too.
- The next day: Select the day heading Section and the programme Section, use Duplicate and change the text.
- Two buttons: Add Two columns. In the left Column, drag in a Button with the text “Change my workshops” and Internal link Person View and manage registration. Give the button the background colour #1E4D3A. In the right Column, drag in a File link with the programme as a PDF. The File link has a border and a white fill: set the background colour to white, and give the text the same colour as your other buttons. Then go to Style Manager Decorations Border and choose width 2px, style Solid and the same colour as the text. Set Corners (radius) to e.g. 24px.
- Last line: Add One column with the background colour #F0F5F1 and a short Text.
- Colour around the email: Select a Section and click the arrow pointing up until Body is selected. Give Body the background colour #E4ECE6. Not all email programs show this colour, and on a phone it is hardly visible. Choose a light colour, and make sure the email also looks good without it.
Write the programme as text with a dash between the time and the title. Do not try to line up the times with extra spaces. Many email clients merge several spaces into one, so the alignment is lost.
Example 4: Welcome email for speakers
A clear email with three steps the speaker needs to complete. Each step has an icon in a narrow Column on the left and the text on the right.
It’s official.
You’re a speaker.
Hi First name, thank you for joining the programme at Nova Summit 2028. Here are the three things we need from you before 1 March.

Send us your slides by 1 March 2028 so we can test them on the stage screens.
- Select Upload my slides below.
- Choose your file in 16:9, as PDF or PowerPoint.
- Select Save.

14 March – 11:00 – Main stage
You have 20 minutes, including 5 minutes for questions.

Meet the technicians at the main stage 30 minutes before your talk. Bring your own clicker if you prefer it.
- Background image: Make the photo in Design studio with a colour tone from the left (#2A1747), so the text can be read on it, and download it without text, 600 px wide. Add One column, select the Section and go to Decorations in Style Manager. Choose the photo under Background image, set Background repeat to no-repeat and Background size to cover. Also set Background colour to #2A1747.
- Logo and text on top: In the same Section, add the logo as an Image and write the headline, the greeting with First name and a short text below it. Make the text white and keep it in the left half, where the tone is darkest. The text stays editable in the email editor.
- The first step: Add Two columns. Select the left Column and make it narrow, about 20%. The right Column takes up the rest. Replace the Text element in the left Column with an Image with the icon. In the right Column, write a bold heading and the text.
- Numbered list: In the first step, write the three actions as a numbered list.
- Coloured words: Make the deadline and the date bold and give them the colour #D97A0B. Use the brush in the inline toolbar, in the same way as the headline in example 1.
- The other steps: Select the Section, use Duplicate twice and change the icon and the text.
- Button: Add One column with a Button. Choose Internal link Person View and manage registration and give the button the background colour #F7941D.
Use icons with the same size and style in all steps. Upload the icons as images, for example 112 × 112 px, and show them at 56 px. Then they are sharp on screens with high resolution.
Outlook on Windows does not show background images. There, the Section shows the Background colour instead, so the white text can still be read. Always choose a background colour when you use a background image.
Example 5: Save the date
A save the date for last year’s participants. Three results from last year are shown in a coloured area, with the image on alternating sides.

A lot has grown since Aarhus
Hi First name, thank you for joining us last year. Green Cities Conference 2029 takes place in Gothenburg on 5–6 September, and registration is now open.
What came out of 2028

Early bird prices apply until 1 May 2029. Read more about our work with green cities on our website.
- Top: Add One column with the logo centred. Add another One column with a centred headline, the greeting with First name, a short text and a Button with the text “Sign up now”. Choose an Internal link to the registration and give the button the background colour #1E4D3A.
- The coloured area: Add One column with the background colour #E3F0E6 and write the heading. Add three Sections with Two columns below it, all with the same background colour. Together they look like one area.
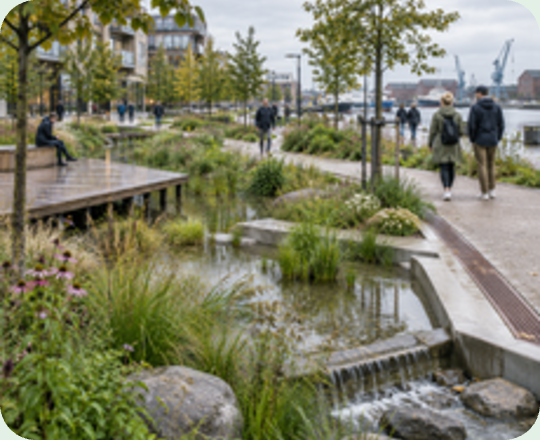
- Image and text on alternating sides: In the first and third Section, put an Image in the left Column and the text in the right Column. In the second Section, do the opposite. Use images of the same size in all three rows, e.g. 270 × 220 px. The rounded corners are made in Design studio: choose Email Custom width, set the width to 270 and the height to 220, add the photo, choose Rounded corners under Shape and use #E3F0E6 as the background, so the corners match the Section.
- Link in the text: Select the words that should be a link and use the link button in the inline toolbar, or Links in the toolbar for an internal link.
- Bottom: Add One column with a short Text and a Button with the text “Visit our website”. Enter the address of your own website in Link (URL). Give the button a white background, a border and text in #1E4D3A, so the sign-up button at the top stands out more. Add the border in the same way as the File link in example 3.
- Colour around the email: Select a Section and click the arrow pointing up until Body is selected. Give Body the background colour #E4ECE6.
On narrow screens, the two Columns are shown below each other. The order then follows the Columns from left to right, so in the second row the text comes before the image.
Before you send, select Send test and check the email on both a computer and a phone. Two and three Columns are shown below each other on narrow screens.