
With the Seats feature, you can create a seating or booking chart for your event. This allows participants to select a specific seat, table, stand, booth, exhibition space, or another bookable place during registration.
Use seating charts for events with assigned seating, exhibitions with stands, dinners with table places, workshops with limited places, or any setup where participants need to choose a specific location or place.

Please note that there are fees for using the Seats feature. To read more, click your name in the top-right corner of Conference Manager and go to Modules.
In this guide, you will learn how to create a chart, decide who it should be available to, choose the chart type, create and label bookable places, use chart categories, add seat reservation information, and activate the chart when it is ready.
Go to The event → Seats and click Add seats to create a new chart.
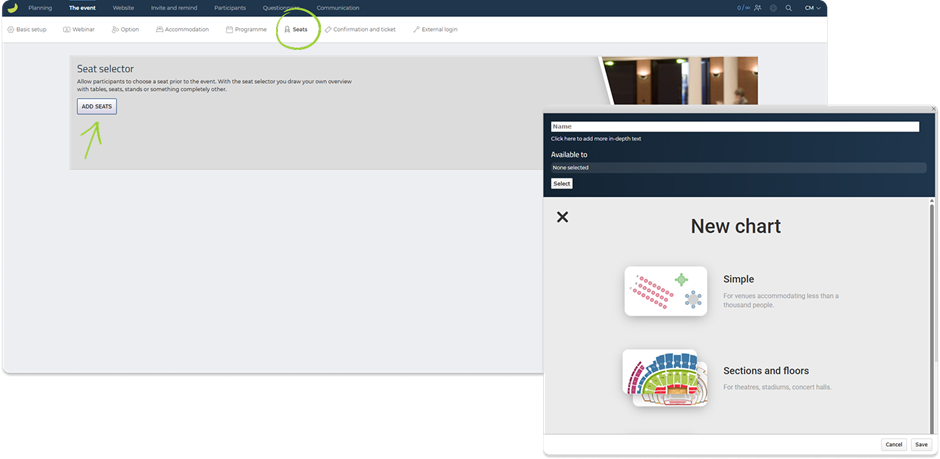
When creating a chart, you can define:
Name and description
Give the chart a name and, if needed, add more detailed information.
Available to
Choose who the chart should be available to. A chart can be connected to either participant categories or options.
Use participant categories if the chart should be available based on the participant type, for example standard participants, VIP guests, or companions.
Use options if the chart should only be available when a participant has selected a specific option, for example a stand package, dinner option, workshop, or booth selection.
Chart type
Choose the type of chart you want to create.
For simpler layouts, you can create a Simple chart. This can be used for smaller venues, stand areas, meeting rooms, table layouts, or other setups where you only need a straightforward selection of bookable places.
For larger or more complex venues, you can use Sections and floors. This is useful for theatres, stadiums, concert halls, or venues with multiple areas or levels.
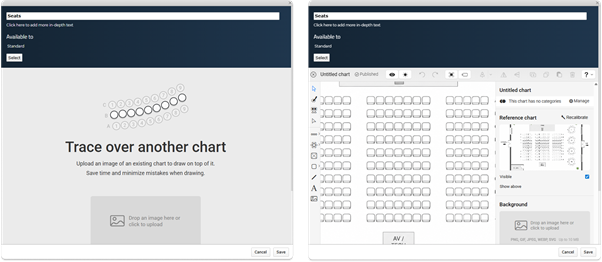
Reference chart
If you already have a floor plan, seating plan, or venue layout, you can upload it and use it as a reference while drawing the chart. This can make it easier to recreate an existing layout and place seats, tables, stands, or other bookable places correctly.
Create the chart layout
After selecting the chart type, the chart editor opens. This is where you create the actual bookable places participants can choose from during registration.
If you have uploaded a reference chart, you can use it as a visual guide while drawing the layout.
Using the chart editor tools
In the chart editor, you use the tools on the left-hand side to build and adjust the layout.
The tools can be used to select and edit objects, create bookable places, and add visual elements such as labels, shapes, lines, images, stages, entrances, or other markers.
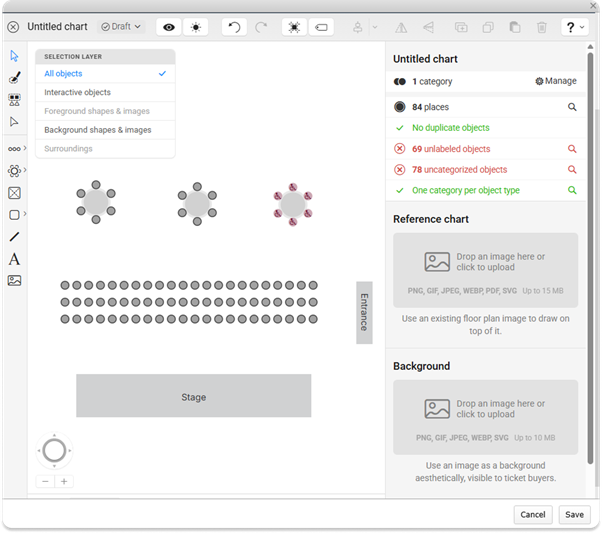
The most important distinction is between interactive objects and visual elements.
Interactive objects are the places participants can select and book, such as seats, tables, booths, stands, or other bookable places.
Visual elements are used to make the chart easier to understand, for example labels, shapes, stages, entrances, background images, or other venue details.
You can also use the Selection layer menu to choose which type of objects you are working with, for example all objects, interactive objects, background elements, foreground elements, or surroundings.
Create bookable places
In the chart editor, you can create different types of bookable places depending on your event setup.
For seating layouts, you can add seats as rows, blocks of rows, or individual seats. This is useful for conference rooms, theatres, or other layouts with numbered seats.
You can also create tables, booths, stands, or other bookable objects. This is useful for dinner seating, exhibitions, sponsor areas, workshops, or setups where participants need to choose a specific table, stand, or place.
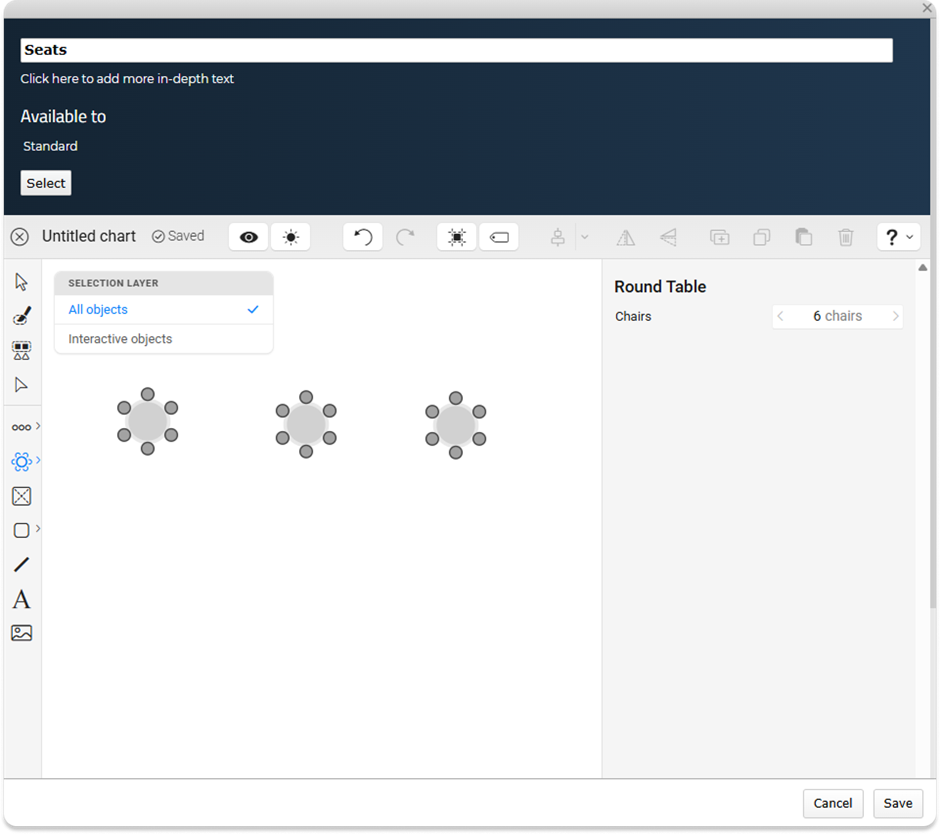
Make sure each bookable place is clearly labelled, for example with row letters, seat numbers, table numbers, booth names, or stand numbers. These labels are used when participants select a place and when administrators review bookings later.
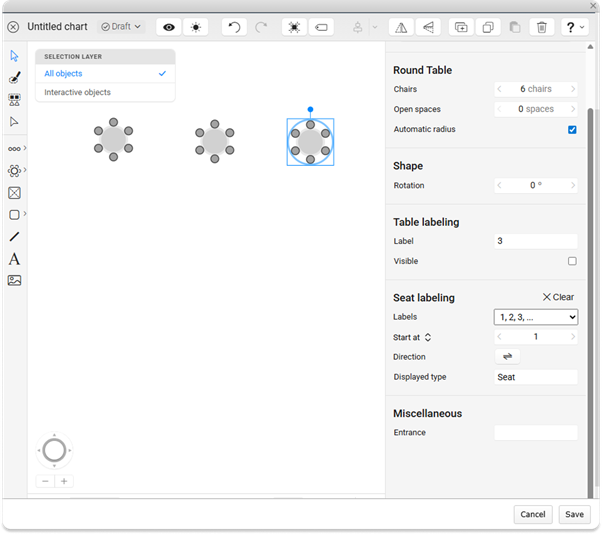
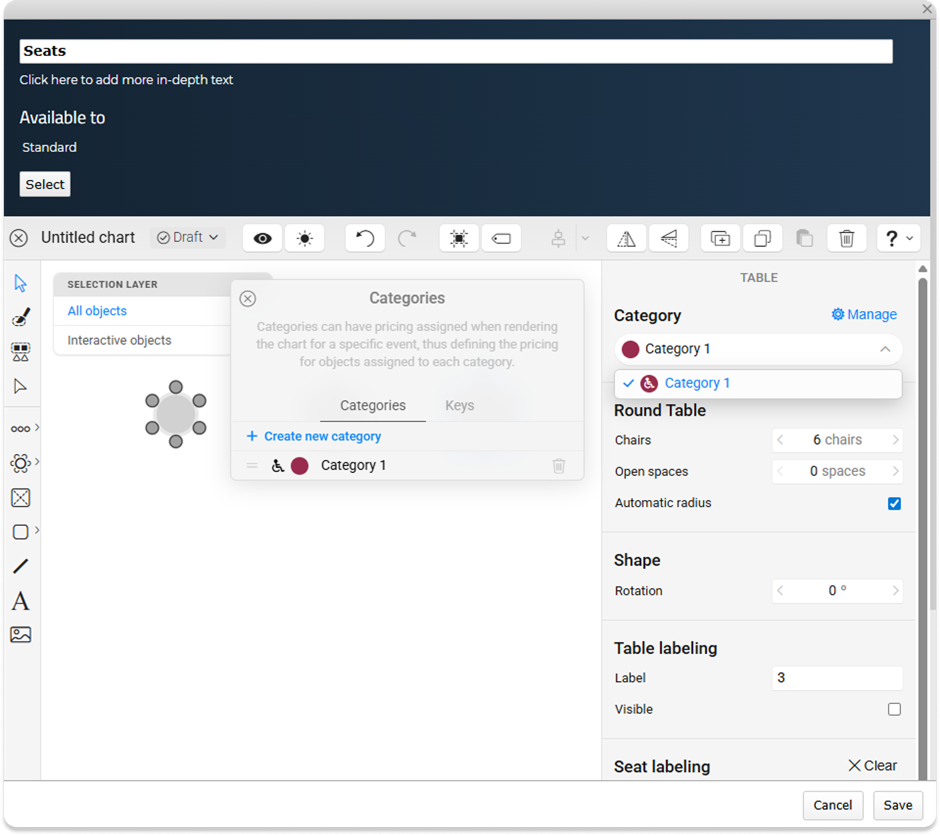
Use chart categories
You can assign chart categories to seats or bookable places. Chart categories can be used to group places by area, type, or price level, for example standard seats, VIP seats, booths, stands, or premium areas.
Please note that chart categories are not the same as participant categories in Conference Manager. Participant categories define who can access the chart during registration, while chart categories are used inside the chart editor to organise and distinguish the bookable places.
To make the chart easier to understand, you can add visual elements such as labels, shapes, stages, entrances, stairs, or other markers that help participants recognise the venue layout.
Once the chart layout is finished, save the chart.
Once the chart has been created, it will appear under Your chart. From here, you can edit the chart, view the booking summary, or manage the chart setup.
You can also add Seat reservation information. This text will be shown to participants when they reach the seat selection step during sign-up. Use it to explain how seat selection works or what participants should be aware of before choosing a place.
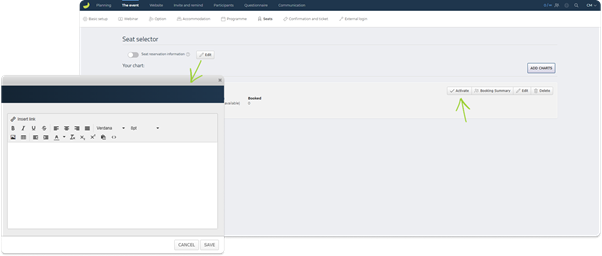
When the chart is ready, remember to click Activate. Participants can only use the chart during registration once it has been activated.
Note: Once a chart has been activated, it cannot be deactivated again. Make sure the chart is finished and connected to the correct participant categories or options before activating it.
When the event is open for registration, participants will be able to choose from the available places connected to their participant category or selected option. The system keeps track of which places are available and which have already been booked.
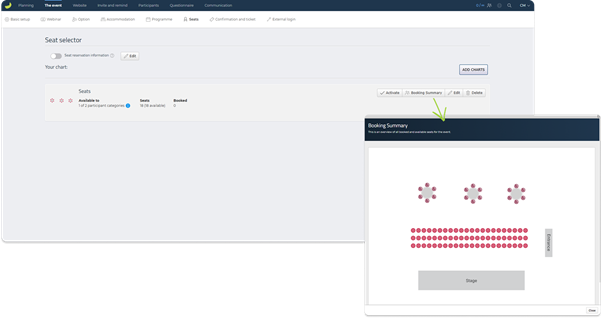
View selected seats
Once participants have started registering, you can view selected seats by clicking Booking Summary on the relevant chart. This gives you an overview of bookings for that specific chart.
For a more detailed participant overview, go to Participants → Other lists → Seats. Here, you can see selected seats or bookable places, including information such as chart, section, row, seat, and participant details, depending on the chart setup.