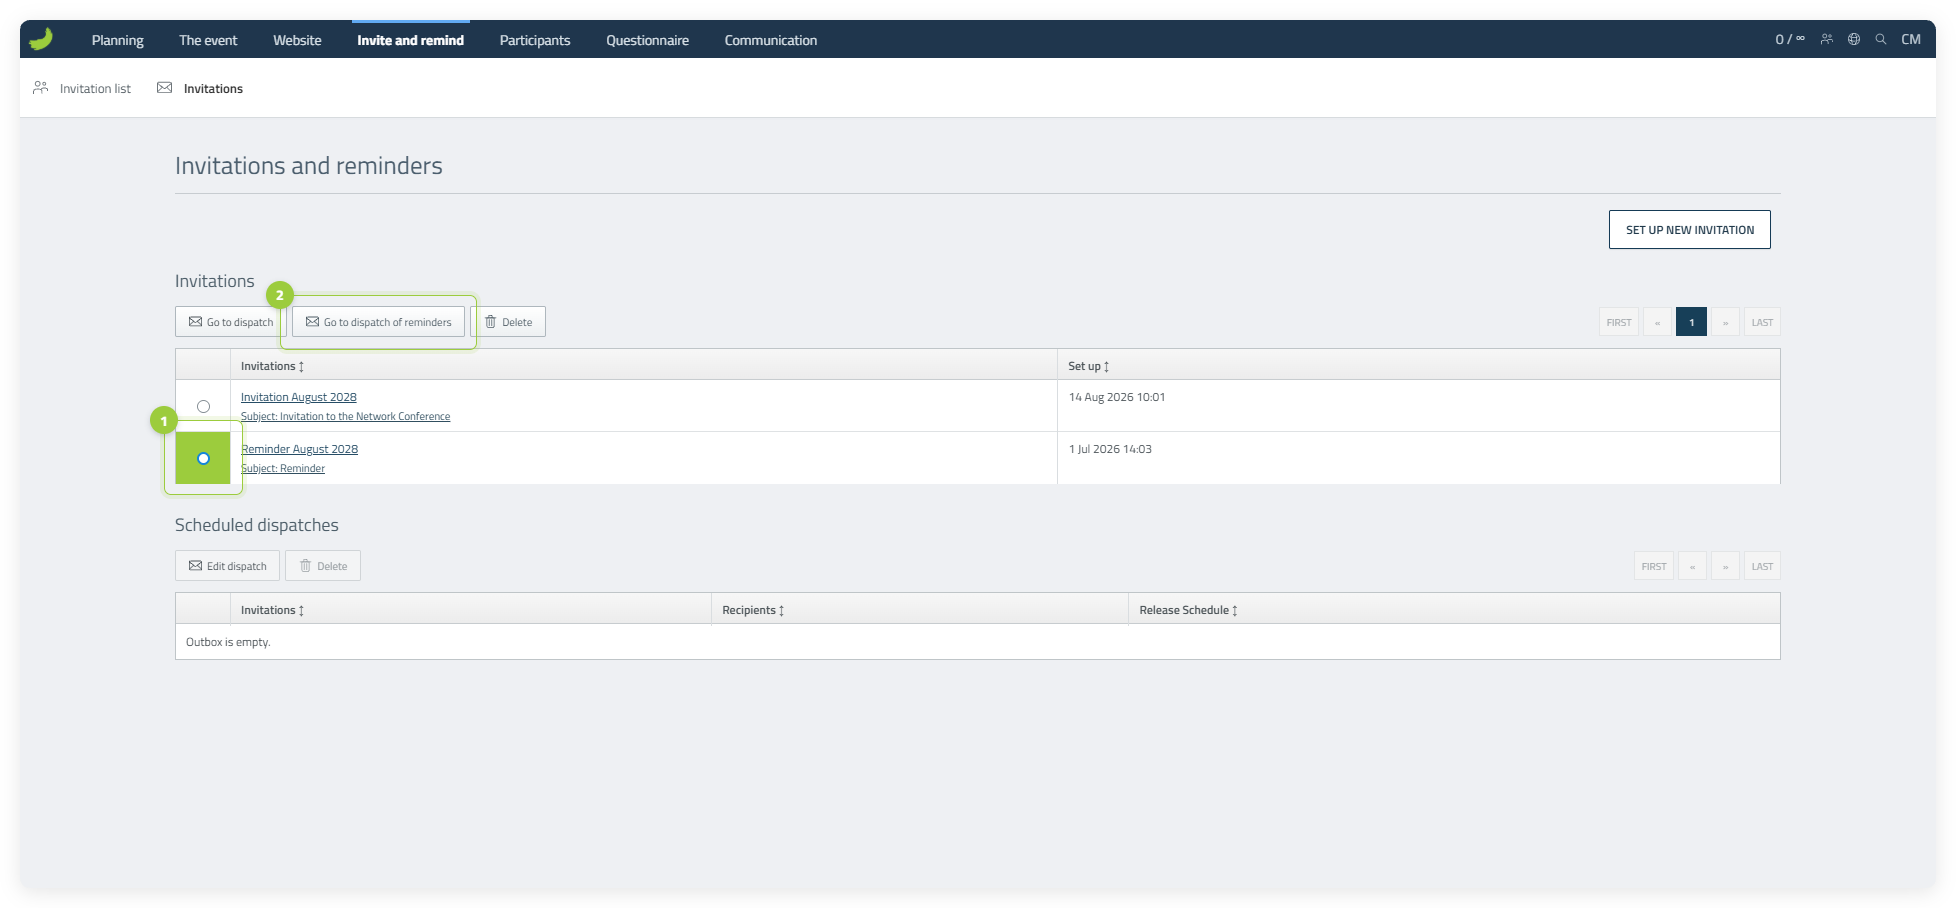

Use Invite and remind to invite people to your event before they have registered. You add the potential participants to the Invitation list, send them an invitation with a registration link, follow their responses and send a reminder to those who have not answered.
Related guideInvite participants outside the systemRead the guideChoose your guide
You can change between the two versions without leaving this article.
Add potential participants
Open the Invitation list
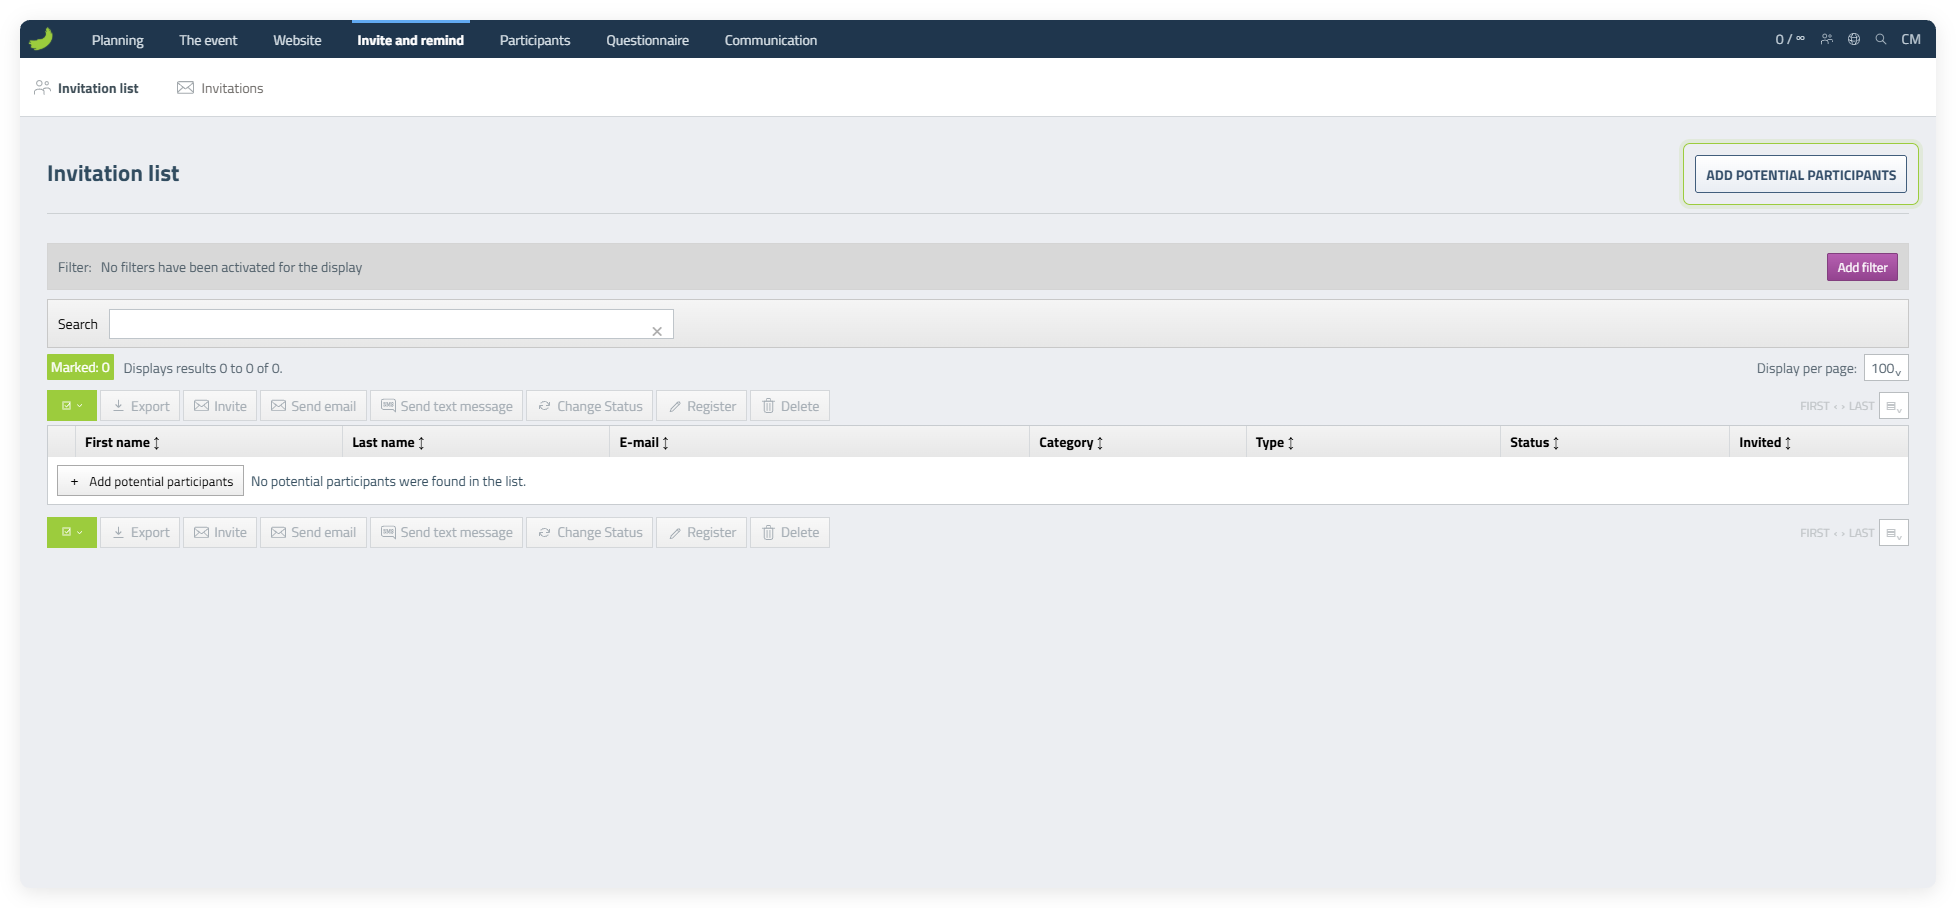
Go to Invite and remind, select Invitation list, and click Add potential participants. This is where you add the people or group emails you want to invite.
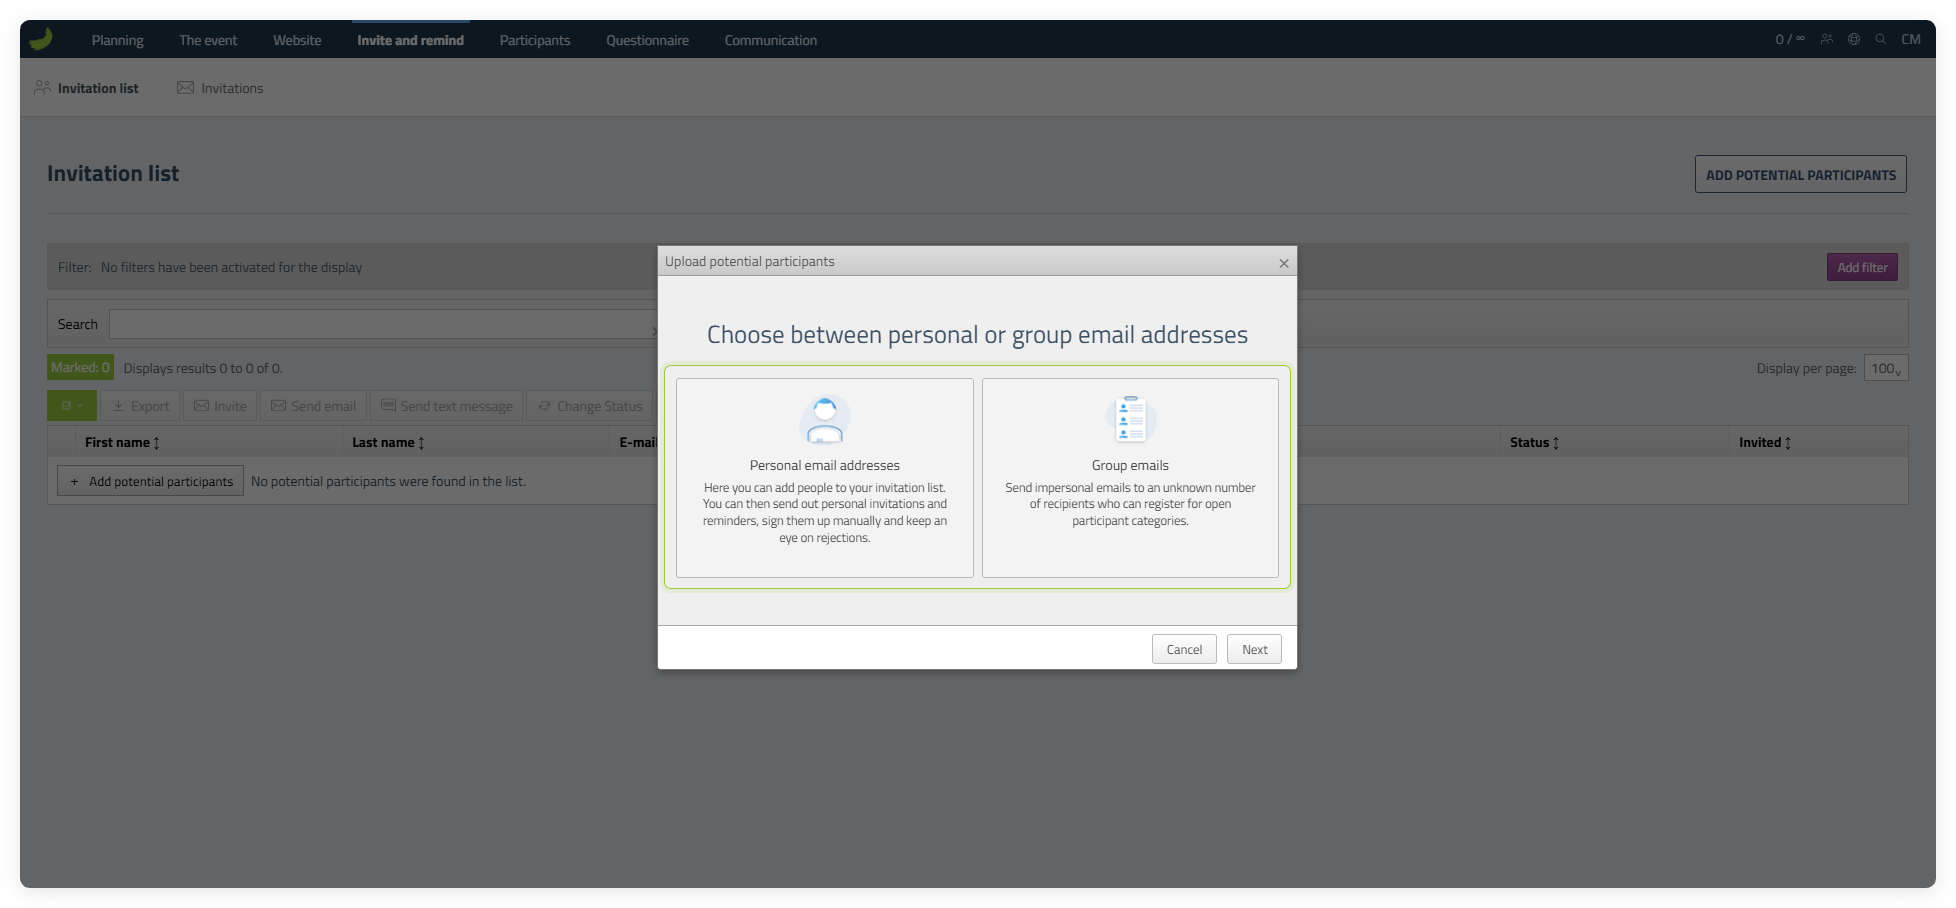
Choose between personal email addresses and group emails
Choose Personal email addresses when the invitation should be connected to a named recipient. Choose Group emails when you are sending to a shared address or the invitation may be forwarded. Select the relevant option, then click Next.
Add the potential participants
After choosing Personal email addresses or Group emails, choose how to add the potential participants.
Add manually
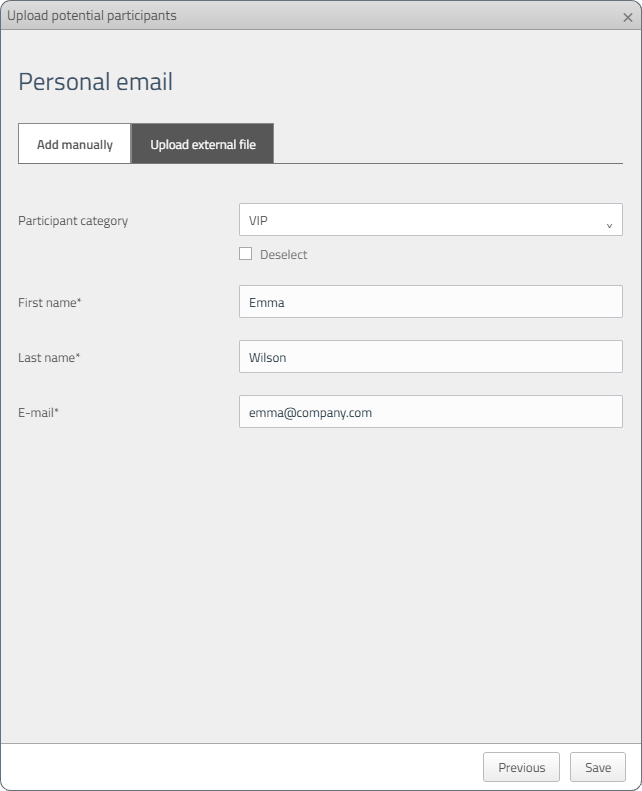
Use this method to add one potential participant at a time. For a personal email address, enter the person’s details. For a group email, enter the Group name and Group email.
Upload external file
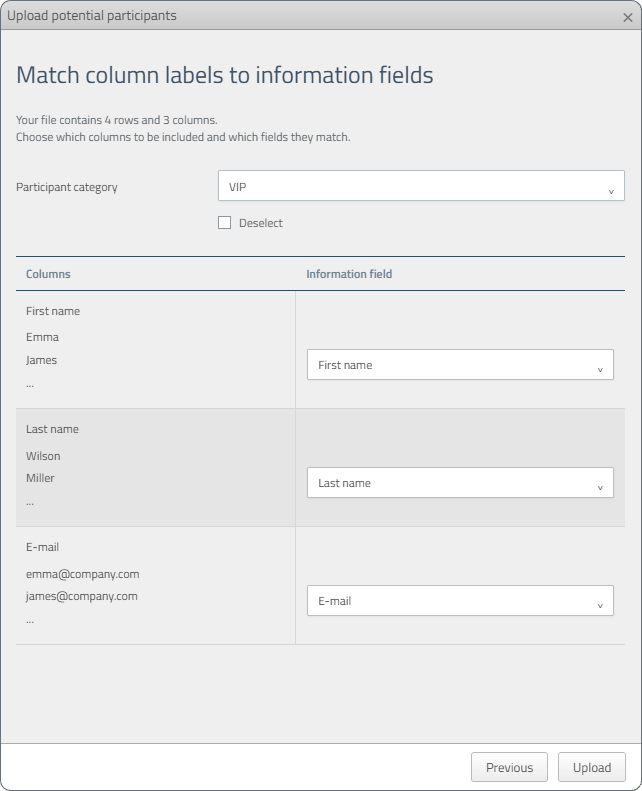
Use this method to add several potential participants at once. After selecting the file, match its columns to the corresponding information fields in CM.
For personal email addresses, you must also select a participant category. If the person should choose a category when registering, select Deselect.
When someone registers through a personal invitation, they are automatically moved to the Participant list. A group email is not connected to one specific person, so its recipients cannot be tracked individually.
Add manually
- Personal email addresses
- Group emails
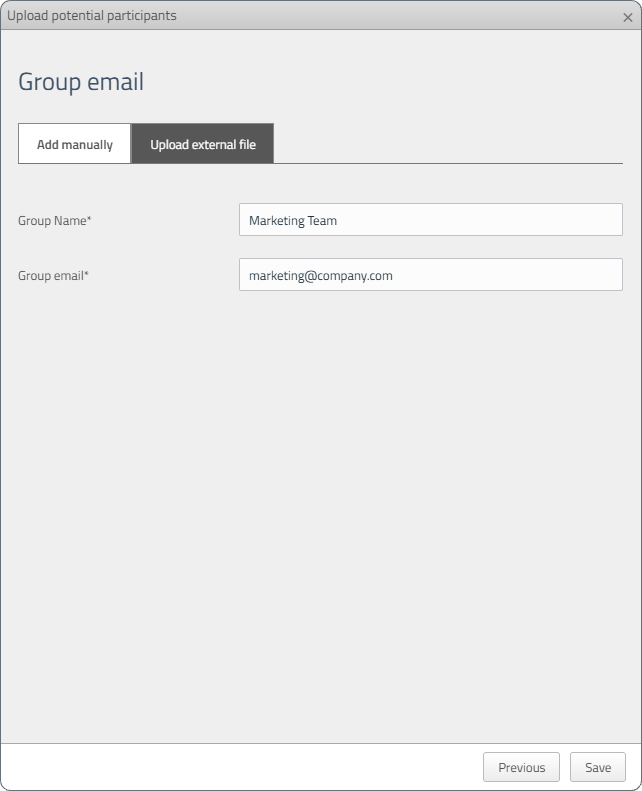
Upload external file
- 1. Upload the file
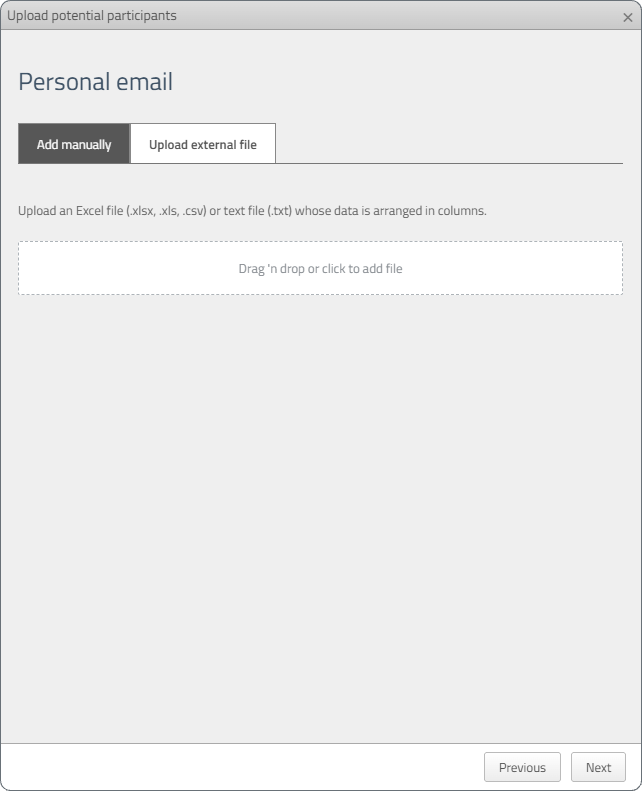
- 2. Match the columns
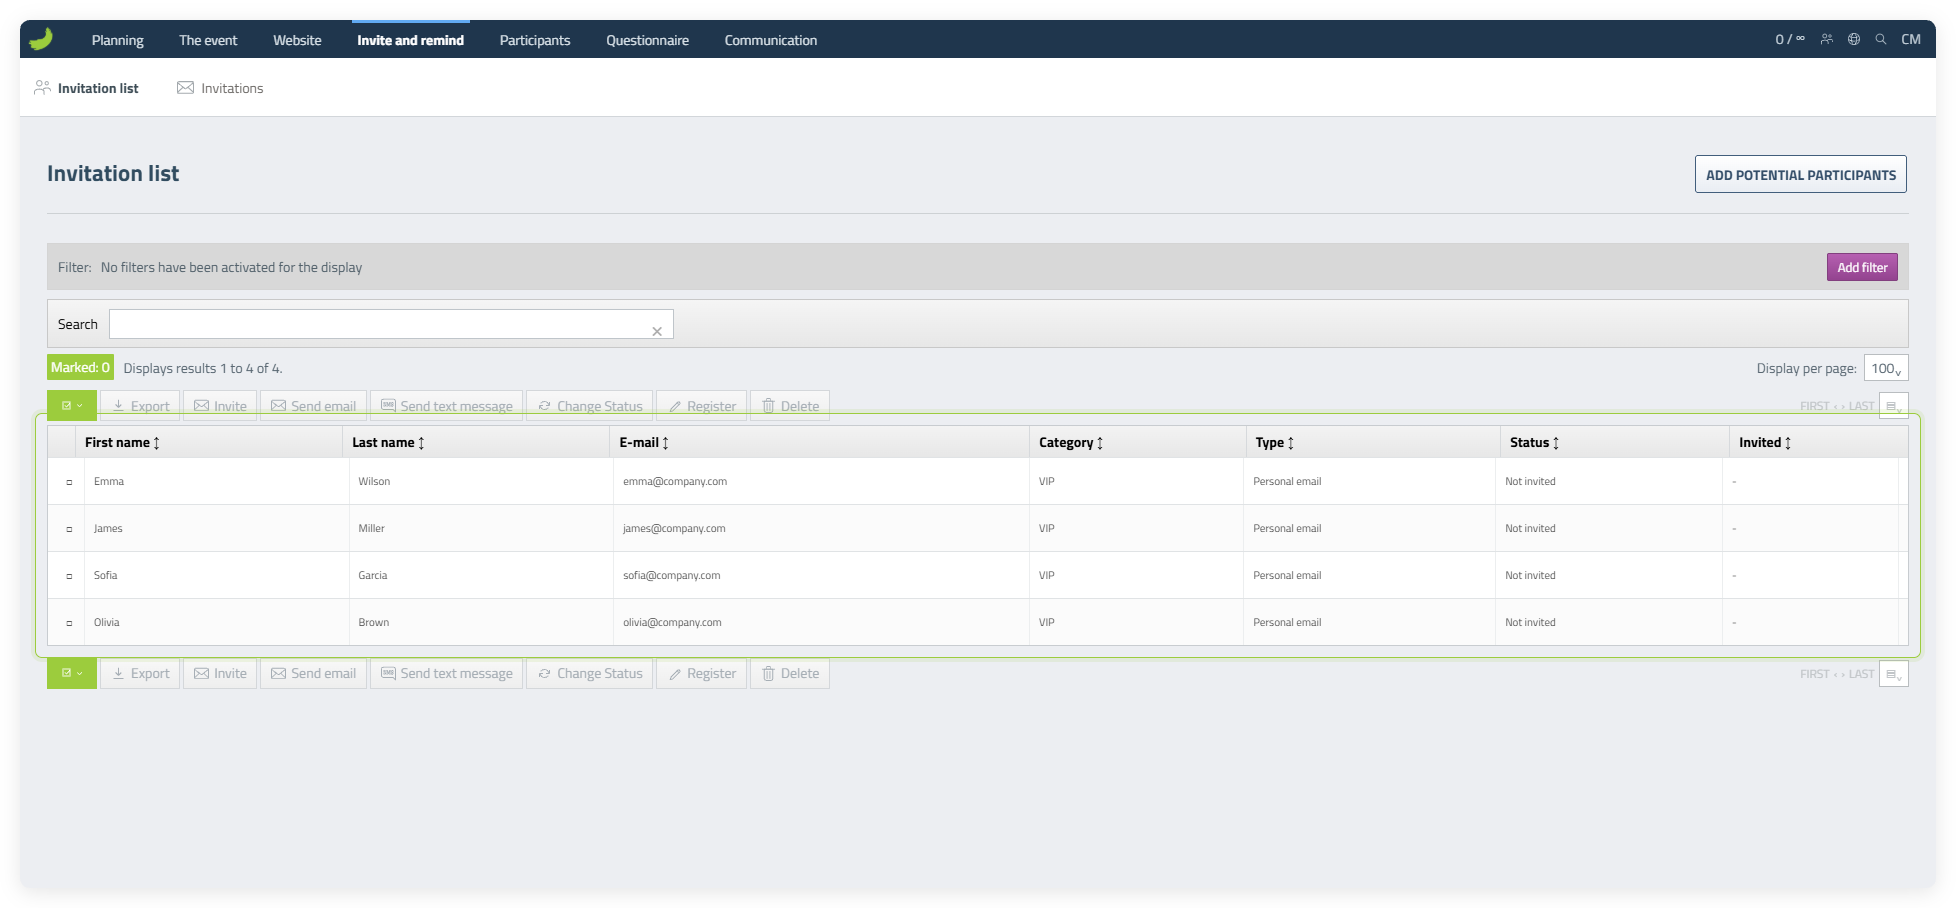
Invitation list
View the potential participants in the list
After potential participants have been added, they appear in the Invitation list. From here, you can search, filter, export, send an email or text message, change a status, register someone manually or delete a potential participant.
Invitations
Create an invitation template
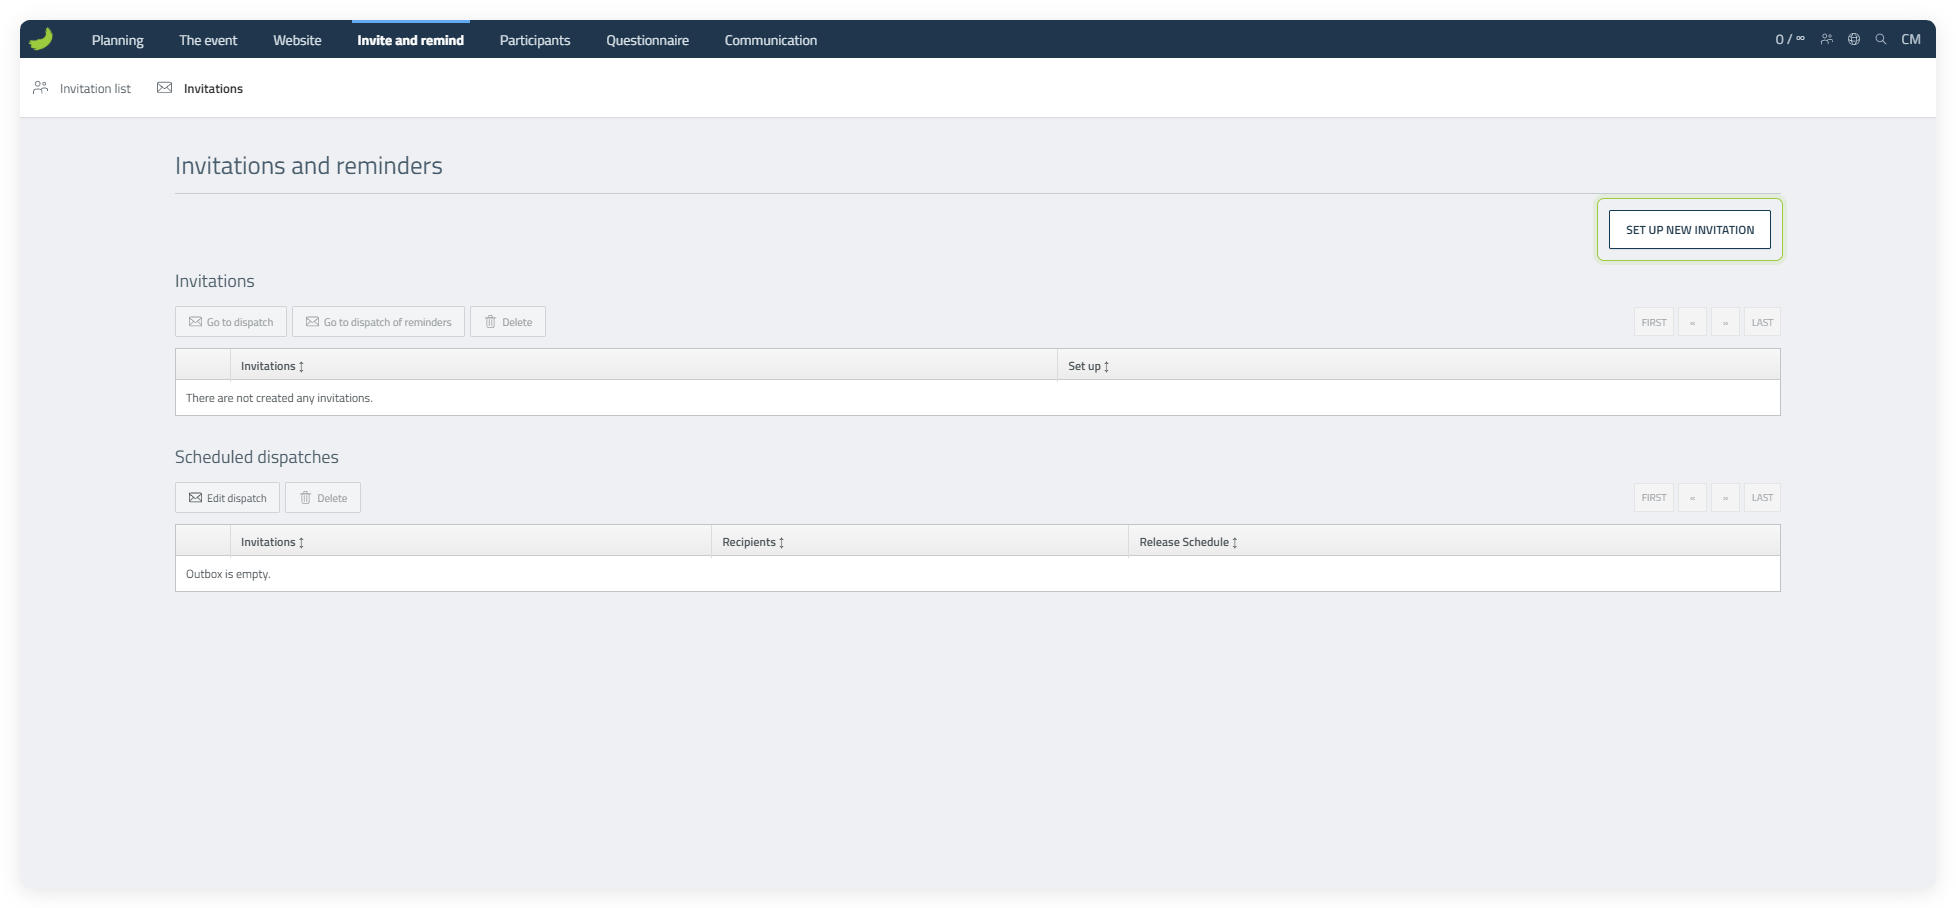
Go to the Invitations tab. The overview is empty the first time you open it. Click Set up new invitation to create the template you want to send to potential participants.
Write the invitation
Enter a subject and write the invitation. Insert personal details lets you add placeholders such as First name. You can also use Insert event information to add the event address, date or other details from the event setup automatically. Remember to add a registration link. Finally, enter an Own reference: an internal name for the template that participants cannot see. Then save the template.
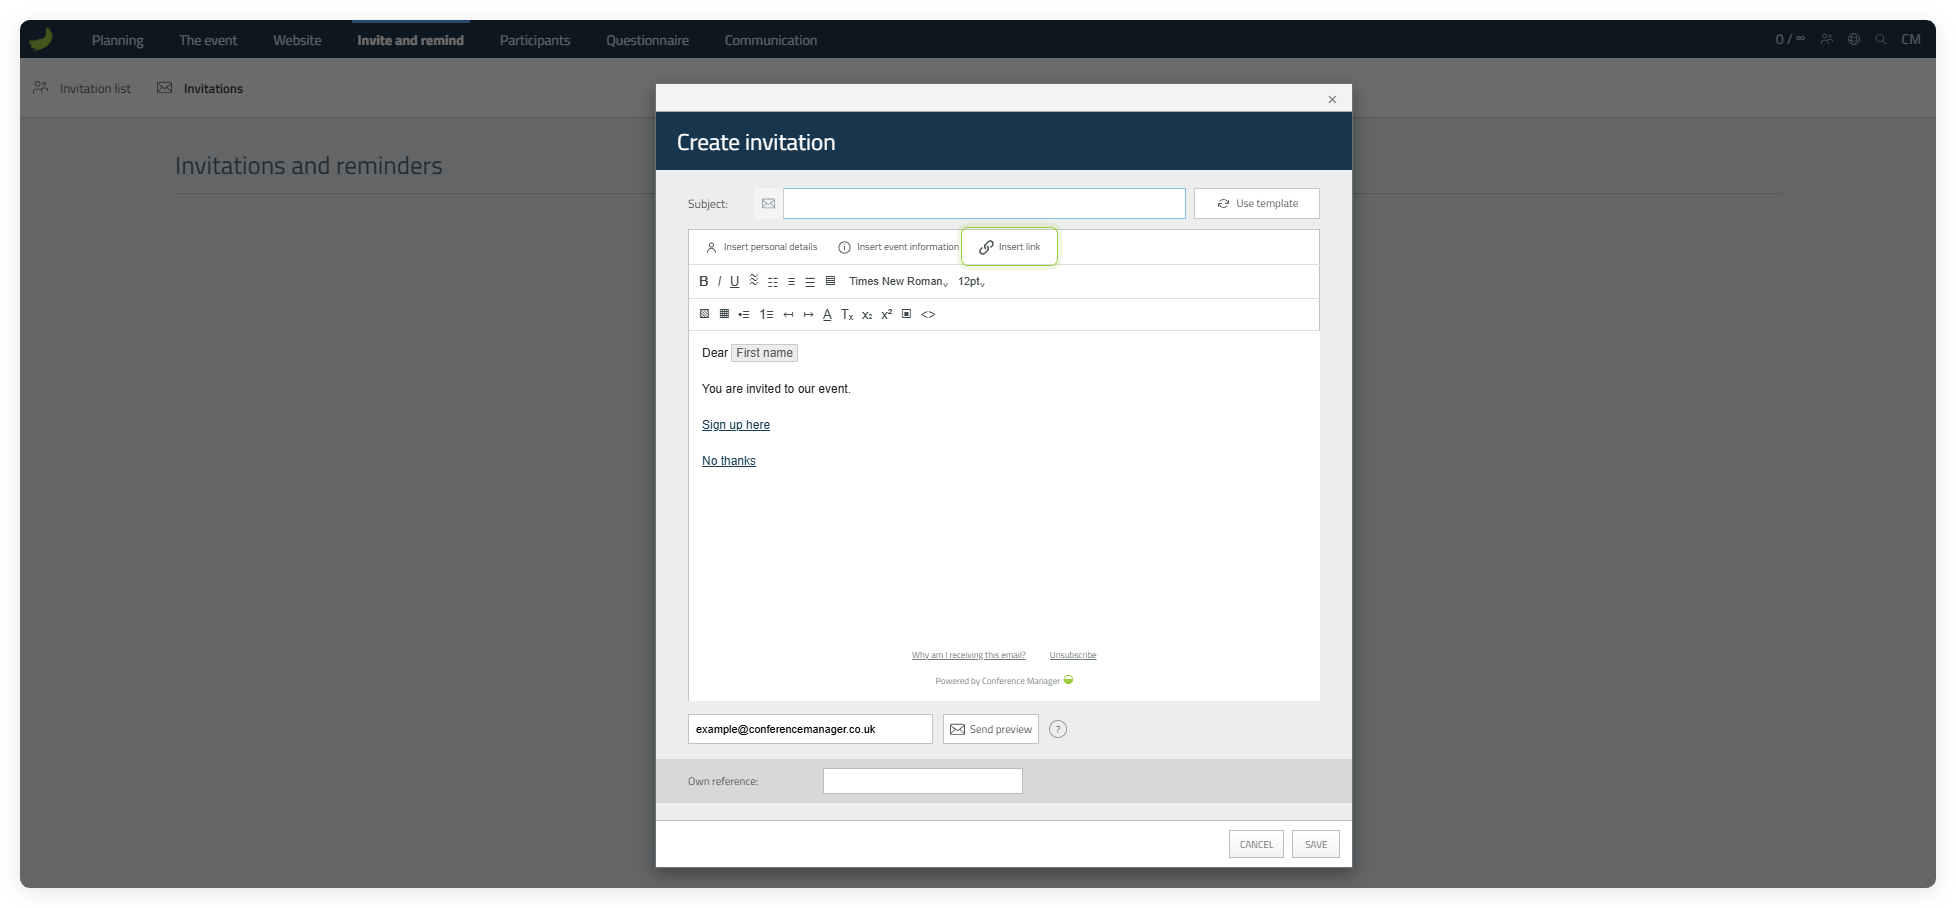
The No thanks link does not work for group emails because individual recipient responses cannot be tracked.
Insert a registration link
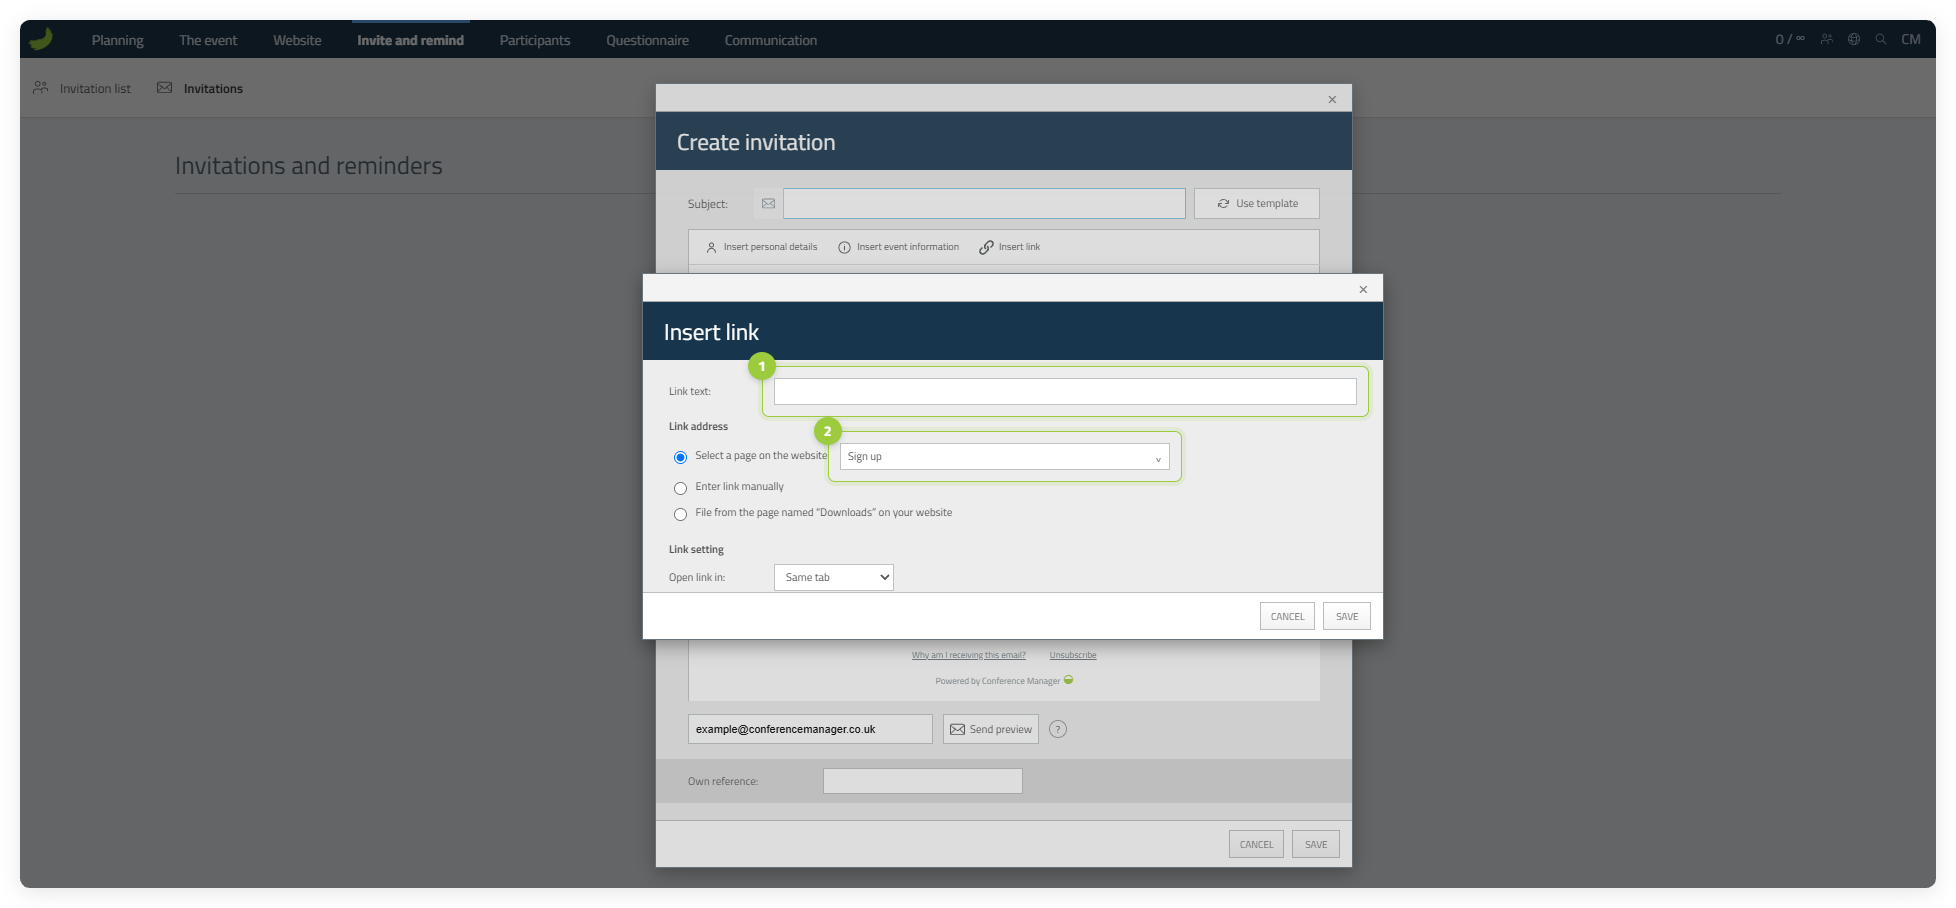
When creating the invitation template, insert a link that recipients can use to register for the event. Click Insert link, enter the clickable text, for example “Sign up here”, and choose Select a page on the website under Link address.
Choose Event description to link to the event front page, or Sign up to link directly to the registration page. If you choose Event description, make sure participants can continue to registration through the navigation or a clear button on the website. Then save the link.
Send the invitation
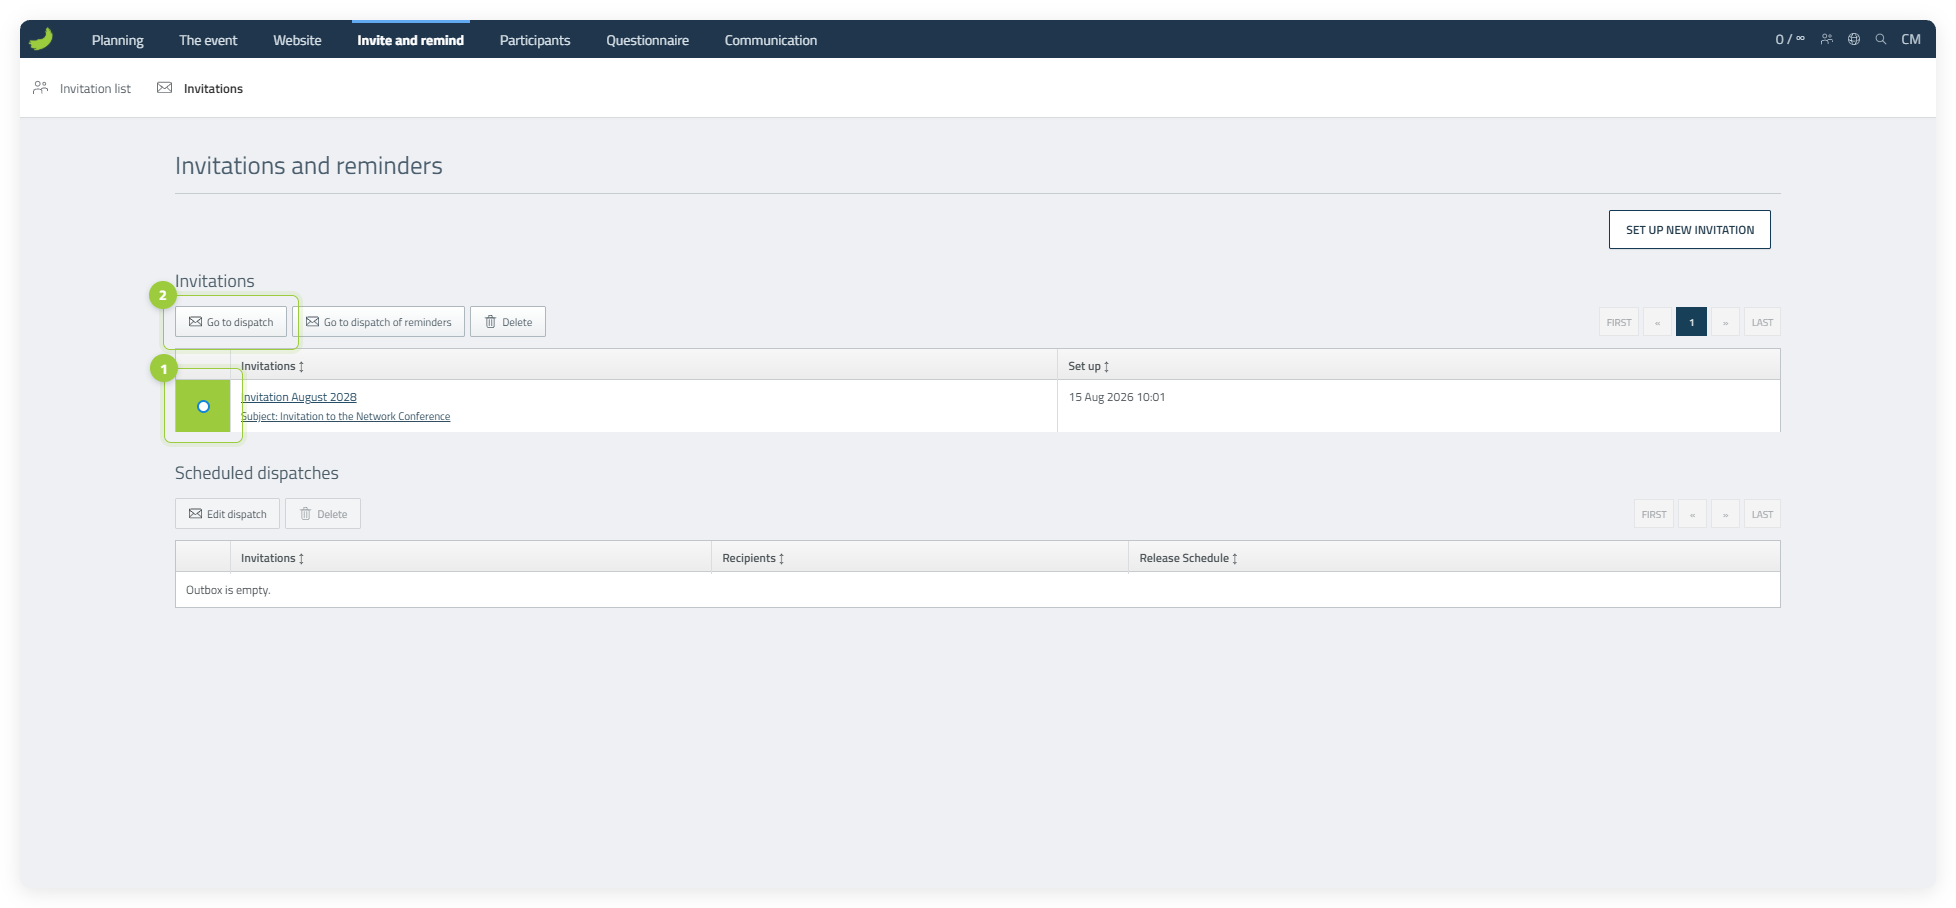
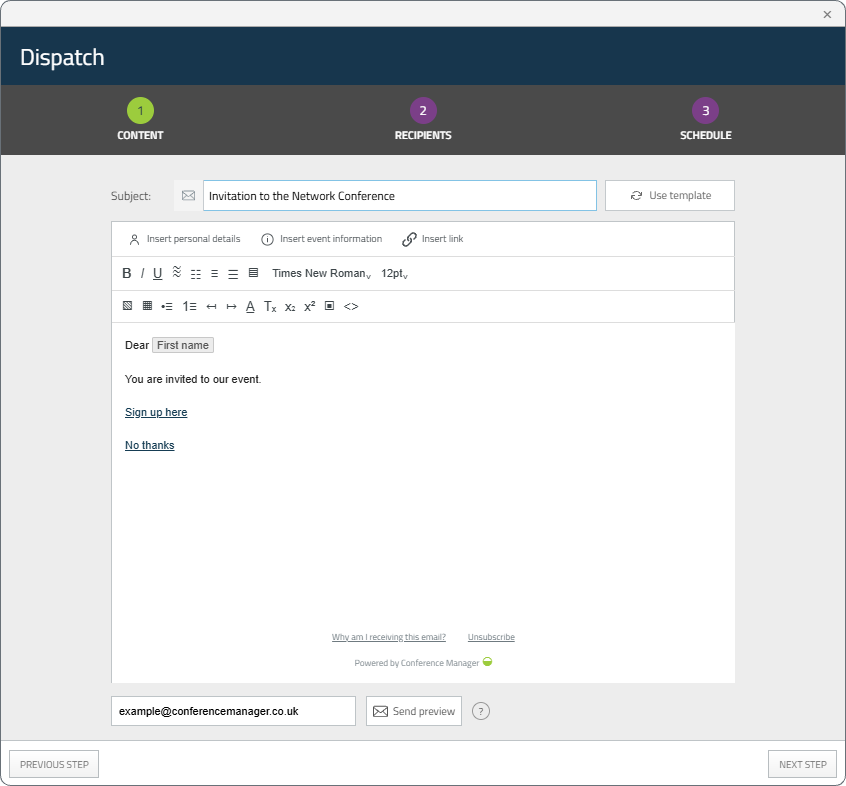
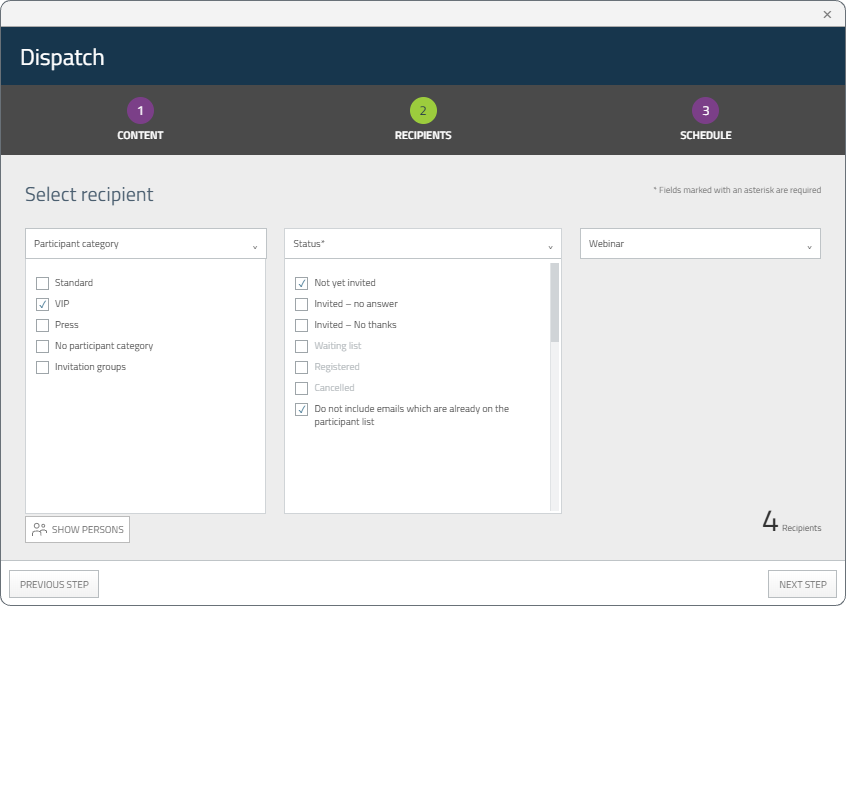
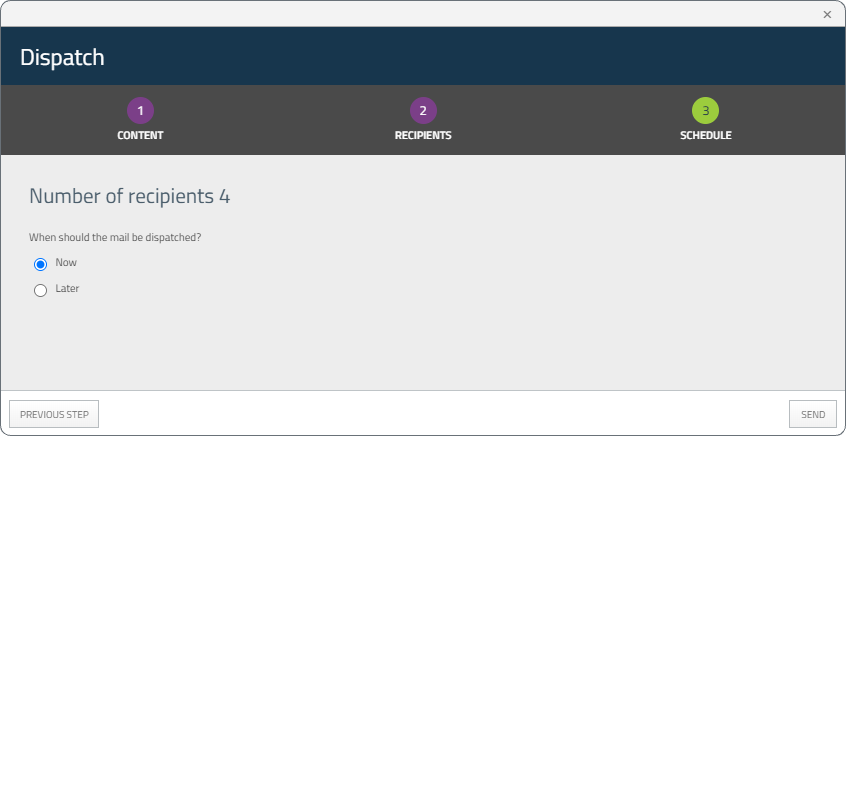
Select the invitation template and click Go to dispatch. The dispatch flow has three steps: Content, Recipients and Schedule. Review the content, select the relevant recipients, then choose whether to send the invitation now or schedule it for later.
Dispatch flow
- 1. Content
- 2. Recipients
- 3. Schedule
Track responses
Track status in the Invitation list
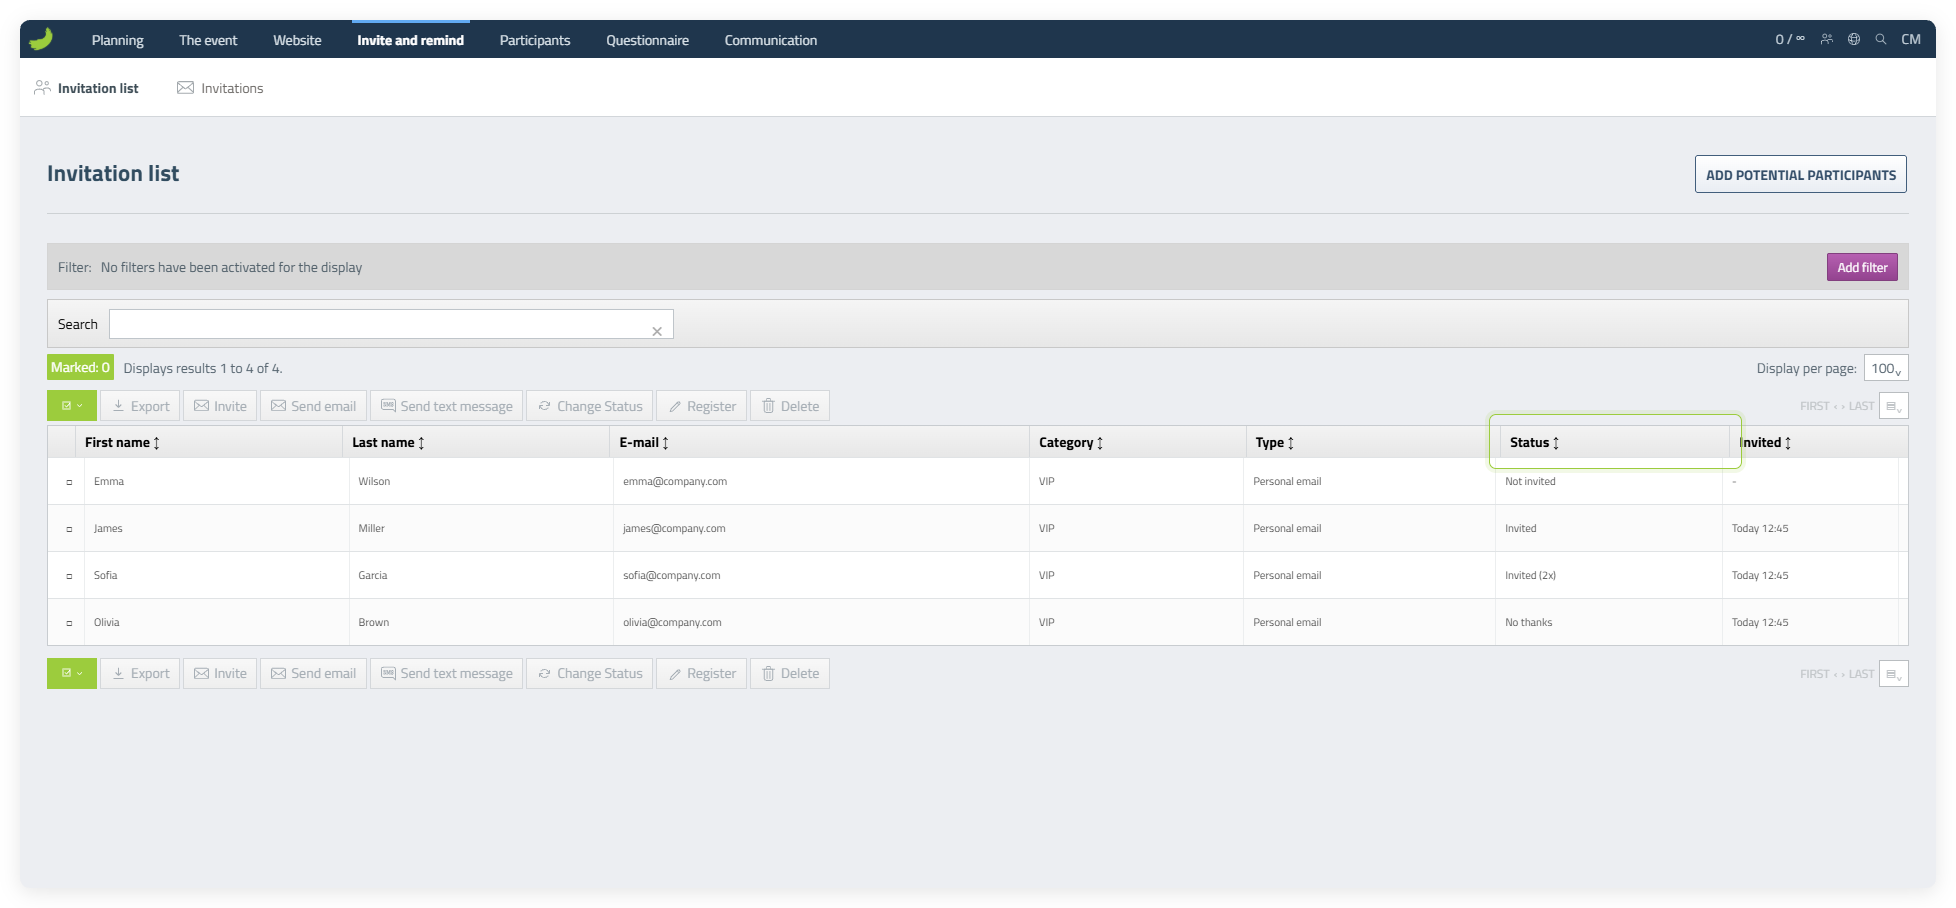
The Status column shows each person’s current status, such as Not invited, Invited, Invited (2x) or No thanks. When someone registers, they are automatically moved to the Participant list.
For a group email, you can see the status of the group email itself, but not individual responses or which people in the Participant list registered through a particular group email invitation.
Send reminders
Send a reminder to people who have not responded
Create a separate reminder template. Select it and click Go to dispatch of reminders. A reminder uses the same three-step dispatch flow as an invitation. In the Recipients step, CM has already selected and locked the status Invited – no answer, ensuring that the reminder is sent only to recipients who have not responded.